BGP on MikroTik: A Complete Configuration Guide
Border Gateway Protocol (BGP) stands as the backbone of internet routing, serving as the critical protocol that enables different Internet Service Providers (ISPs) to exchange routing information seamlessly. As the internet continues to expand, the demand for reliable, scalable, and cost-effective routing solutions grows in parallel. This is where MikroTik routers have carved out a significant niche in the market.
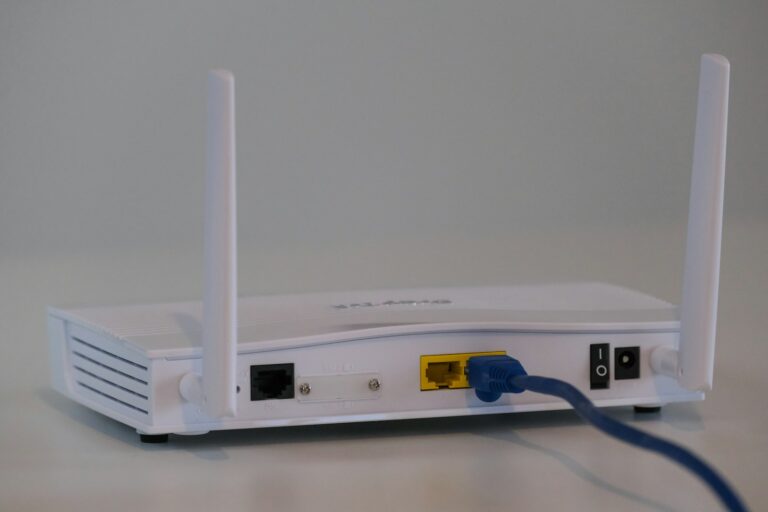
MikroTik’s RouterOS provides a robust BGP implementation that offers enterprise-grade features at a fraction of the cost of traditional networking vendors. Whether you’re managing a growing ISP network, establishing connections at Internet Exchange Points (IXPs), or implementing redundant internet connections for a corporate network, understanding how to properly configure BGP on MikroTik devices is an invaluable skill.
This comprehensive guide is crafted specifically for network engineers and system administrators who need to implement, optimize, or troubleshoot BGP on MikroTik platforms. By the end of this article, you’ll have the knowledge to:
- Configure BGP peering sessions from scratch
- Implement advanced routing policies
- Secure your BGP infrastructure against common threats
- Monitor and troubleshoot BGP-related issues
- Deploy BGP in various real-world scenarios
Let’s dive into the world of BGP on MikroTik and unlock the full potential of your network’s routing capabilities.
Table of Contents
- Understanding BGP Fundamentals
- MikroTik RouterOS BGP Capabilities
- Pre-Configuration Checklist
- Basic BGP Configuration on MikroTik
- Advanced BGP Configuration
- BGP Routing Policies
- BGP Security Best Practices
- Monitoring BGP on MikroTik
- Real-World Deployment Scenarios
- Troubleshooting Common BGP Issues
- Case Study: Large-Scale BGP Deployment
- Conclusion
Understanding BGP Fundamentals
Before we delve into the configuration specifics, it’s crucial to have a solid understanding of what BGP is and why it’s so important for internet routing.
What is BGP?
Border Gateway Protocol (BGP) is an exterior gateway protocol designed to exchange routing and reachability information among autonomous systems (AS) on the internet. Unlike interior gateway protocols such as OSPF or EIGRP that operate within a single organization’s network, BGP is designed to handle routing between different organizations, making it the protocol of choice for ISP interconnection.
BGP is defined in RFC 4271 and is currently in version 4 (BGP-4), which has been the standard since 1994 with various extensions added over time.
Key BGP Concepts
To effectively configure BGP on MikroTik, you need to understand these fundamental concepts:
- Autonomous System (AS): A collection of networks under a single administrative domain, identified by a unique AS number (ASN).
- EBGP vs. IBGP: External BGP operates between different autonomous systems, while Internal BGP runs between routers within the same AS.
- BGP Peering: The establishment of a TCP connection (port 179) between BGP speakers to exchange routing information.
- Path Attributes: Characteristics of a route such as AS_PATH, NEXT_HOP, and LOCAL_PREF that influence the BGP path selection process.
- Route Advertisement: The process of announcing network prefixes to BGP peers.
Why BGP for ISP Interconnection?
BGP excels at ISP interconnection for several compelling reasons:
- Scalability: BGP can handle hundreds of thousands of routes, making it suitable for internet-scale routing.
- Policy Control: It provides extensive control over routing policies, allowing operators to implement business agreements.
- Stability: BGP is designed to be stable in the face of frequent network changes.
- Path Selection: It uses a sophisticated path selection algorithm that considers multiple factors beyond simple hop count.
With these fundamentals in mind, let’s explore how MikroTik implements BGP functionality in RouterOS.
MikroTik RouterOS BGP Capabilities
MikroTik’s RouterOS includes a powerful BGP implementation that supports most features needed for production deployments.
Supported BGP Features
RouterOS supports a comprehensive set of BGP features, including:
- IPv4 and IPv6 BGP sessions
- BGP communities (standard, extended, and large)
- BGP multipath for load balancing
- Route reflection for scalable IBGP deployments
- Multi-protocol BGP extensions
- BFD (Bidirectional Forwarding Detection) for fast failure detection
- BGP confederations
- RPKI validation
- Various authentication methods
Hardware Considerations
While MikroTik’s software is capable, the hardware you select can significantly impact BGP performance:
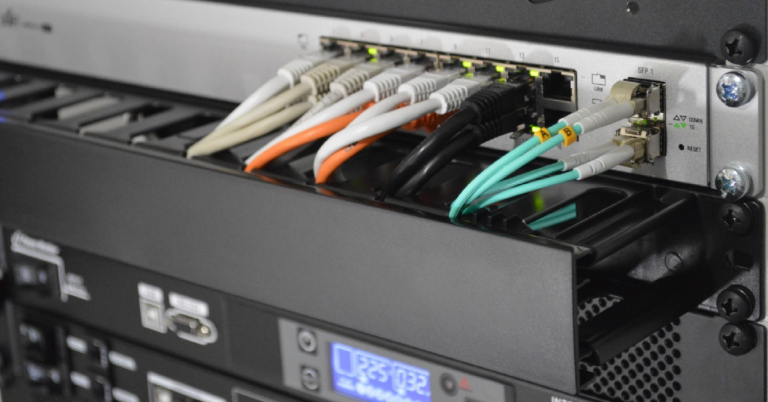
- CPU Performance: BGP is CPU-intensive, especially during convergence events. Models with multi-core processors like the CCR series are recommended for BGP deployments with full routing tables.
- Memory Requirements: A full BGP routing table currently requires at least 2GB of RAM, with more needed for multiple full tables or extensive filtering.
- Recommended Models:
- CCR2004-1G-12S+2XS – Ideal for high-performance routing
- CCR1072-1G-8S+ – Excellent for handling multiple full BGP tables
- RB5009 – Good for smaller deployments with partial tables
RouterOS Version Recommendations
Not all RouterOS versions are created equal when it comes to BGP functionality:
- Version 6.49.x and above include significant BGP improvements
- Version 7.x introduces a new BGP implementation with enhanced features
- For production environments, stick to long-term releases to ensure stability
Pre-Configuration Checklist
Proper planning is essential before implementing BGP. Here’s what you need to prepare:
Required Information
- Autonomous System Number (ASN): Either a public ASN obtained from your Regional Internet Registry (RIR) or a private ASN for internal use (range 64512-65534 for 16-bit or 4200000000-4294967294 for 32-bit).
- IP Addressing Plan: Documented public IP blocks to be announced via BGP.
- Peering Details: Information about your BGP peers, including ASNs, IP addresses, and agreed routing policies.
- Routing Policy: Clear understanding of import/export policies, including which routes to accept or announce.
Network Topology Planning
Consider the following topology factors:
- Redundancy Requirements: Determine if you need multiple BGP connections for reliability.
- Traffic Engineering Goals: Identify if you need to control inbound/outbound traffic paths.
- Internal Architecture: Decide between a flat BGP design or a hierarchical one with route reflectors.
- Physical Connectivity: Ensure your physical links match your logical BGP design.
Security Considerations
Before implementing BGP, address these security concerns:
- Filter Planning: Determine which prefixes you’ll allow in and out.
- Resource Allocation: Ensure sufficient resources are available for BGP processes.
- Monitoring Strategy: Plan how you’ll monitor BGP sessions and route changes.
- Fallback Mechanisms: Establish contingency plans for BGP failures.
Basic BGP Configuration on MikroTik
Let’s start with a step-by-step basic BGP configuration on MikroTik.
Configuring Router Identity and AS Number
First, set your router identity and AS number:
/system identity
set name="ISP-Border-Router"

/ip address
add address=192.0.2.1/30 interface=ether1 comment="ISP1 Link"
add address=198.51.100.1/30 interface=ether2 comment="ISP2 Link"
add address=203.0.113.1/24 interface=ether3 comment="Internal Network"

/routing bgp instance
add name=default as=65001 router-id=192.0.2.1
Setting Up BGP Peering
Now configure BGP peers for each ISP connection:
/routing bgp peer
add name=ISP1 remote-address=192.0.2.2 remote-as=64500 route-reflect=no
add name=ISP2 remote-address=198.51.100.2 remote-as=64501 route-reflect=no
Advertising Networks
Set up network advertisements:
/routing bgp network
add network=203.0.113.0/24 synchronize=yes
Verifying BGP Configuration
After configuration, verify that your BGP sessions are established:
/routing bgp peer print
You should see the “established” state for each peer if connections are successful.
Basic Configuration via WinBox
If you prefer using WinBox, the same configuration can be accomplished by:
- Going to IP → Addresses to set up IP addresses
- Navigating to Routing → BGP → Instances to create your BGP instance
- Under Routing → BGP → Peers to configure your BGP peers
- Using Routing → BGP → Networks to advertise your networks
Advanced BGP Configuration
Once you have basic BGP connectivity, you can implement more advanced features for greater control and scalability.
Route Filtering with Prefix Lists
Prefix lists are essential for controlling which routes you accept or announce:
/routing filter rule
add chain=ISP1-in prefix=0.0.0.0/0 prefix-length=32 action=accept comment="Default Route"
add chain=ISP1-in prefix=10.0.0.0/8 prefix-length=8-24 action=discard comment="Block RFC1918"
add chain=ISP1-in prefix=172.16.0.0/12 prefix-length=12-24 action=discard comment="Block RFC1918"
add chain=ISP1-in prefix=192.168.0.0/16 prefix-length=16-24 action=discard comment="Block RFC1918"

/routing bgp peer
set ISP1 in-filter=ISP1-in
BGP Communities Implementation
Communities allow for more granular routing policies:
/routing bgp community-list
add name=NO-EXPORT rule="0:65001"

/routing filter rule
add chain=OUT-FILTER prefix=203.0.113.128/25 set-bgp-communities=65001:65 action=accept

/routing bgp peer
set ISP1 out-filter=OUT-FILTER
Route Reflection for IBGP Scalability
For larger networks with multiple IBGP speakers, configure route reflection to avoid a full IBGP mesh:
/routing bgp instance
set default cluster-id=1.1.1.1

/routing bgp peer
add name=IBGP-Client1 remote-address=10.0.0.2 remote-as=65001 route-reflect=yes
add name=IBGP-Client2 remote-address=10.0.0.3 remote-as=65001 route-reflect=yes
BGP Multipath for Load Balancing
Enable BGP multipath to utilize multiple equal-cost paths:
/routing bgp instance
set default redistribute-connected=yes routing-table=main

/ip route
set distance=1 gateway=192.0.2.2,198.51.100.2 check-gateway=ping
BGP Routing Policies
Effective BGP operation requires well-designed routing policies.
Import and Export Policies
Control route acceptance and advertisement:
/routing filter rule
add chain=import-policy prefix=0.0.0.0/0 action=accept comment="Accept Default"
add chain=import-policy action=reject comment="Reject Everything Else"

add chain=export-policy prefix=203.0.113.0/24 action=accept comment="Advertise Our Network"
add chain=export-policy action=reject comment="Reject Everything Else"

/routing bgp peer
set ISP1 in-filter=import-policy out-filter=export-policy
set ISP2 in-filter=import-policy out-filter=export-policy
Route Aggregation
Reduce routing table size with aggregation:
/routing bgp aggregate
add instance=default prefix=203.0.113.0/24 summary-only=yes
Traffic Engineering
Influence outbound traffic:
/routing filter rule
add chain=ISP1-in prefix=8.8.8.0/24 set-bgp-local-pref=200 action=accept comment="Prefer ISP1 for Google DNS"

/routing bgp peer
set ISP1 in-filter=ISP1-in
Influence inbound traffic:
/routing filter rule
add chain=ISP1-out prefix=203.0.113.0/25 set-bgp-prepend=65001,65001 action=accept comment="Prefer ISP2 for This Subnet"

/routing bgp peer
set ISP1 out-filter=ISP1-out
BGP Security Best Practices
Security should be a top priority in any BGP deployment.
Peer Authentication
Implement MD5 authentication for BGP sessions:
/routing bgp peer
set ISP1 tcp-md5-key="SecurePasswordHere"
Prefix Filtering
Implement strict prefix filtering for both inbound and outbound routes:
/routing filter rule
add chain=ISP1-in prefix=0.0.0.0/0 prefix-length=8-24 action=accept comment="Accept Specific Prefix Lengths"
add chain=ISP1-in action=reject comment="Deny Everything Else"

/routing bgp peer
set ISP1 in-filter=ISP1-in
RPKI Validation
Set up Resource Public Key Infrastructure validation to prevent route hijacking:
/routing rpki
add address=rpki.ripe.net port=8282 group=RIPE

/routing filter rule
add chain=rpki-check bgp-rpki-validation=valid action=accept
add chain=rpki-check bgp-rpki-validation=invalid action=reject
add chain=rpki-check action=accept

/routing bgp peer
set ISP1 rpki-validation=yes
Max-Prefix Limits
Protect against route floods:
/routing bgp peer
set ISP1 max-prefix-limit=5000 max-prefix-restart-time=5m
Monitoring BGP on MikroTik
Effective monitoring is critical for maintaining a healthy BGP environment.
CLI Commands for BGP Troubleshooting
Essential commands for BGP monitoring:
/routing bgp peer print status        # View peer status
/routing bgp peer print detail        # Detailed peer information
/routing bgp advertisements print     # View advertised routes
/routing bgp network print            # View configured networks
/log print where topics~"bgp"         # Check BGP-related logs
Using The Dude for BGP Monitoring
The Dude network monitoring tool can be configured to monitor BGP sessions:
- Add your MikroTik devices to The Dude
- Create custom “RouterOS BGP” service
- Configure notifications for state changes
Setting Up Logging and Alerts
Configure detailed BGP logging:
/system logging
add topics=bgp action=memory
add topics=bgp action=disk

/system script
add name=bgp-down source={
    :if ([/routing bgp peer get ISP1 state] != "established") do={
        /tool e-mail send to="admin@example.com" subject="BGP Down" body="BGP session with ISP1 is down!"
    }
}

/system scheduler
add name=check-bgp interval=5m on-event=bgp-down
Third-Party Monitoring Integration
Export BGP data to external monitoring tools:
/tool graphing interface
add interface=ether1 store-on-disk=yes
Enable SNMP for external monitoring:
/snmp community
add name=public address=10.0.0.0/24

/snmp
set enabled=yes
Real-World Deployment Scenarios
Let’s explore common BGP deployment scenarios.
Single-Homed ISP Configuration
A basic setup for connecting to a single ISP:
/routing bgp instance
add name=default as=65001 router-id=192.0.2.1

/routing bgp peer
add name=ISP1 remote-address=192.0.2.2 remote-as=64500

/routing bgp network
add network=203.0.113.0/24
Multi-Homed ISP Setup
A redundant setup connecting to multiple ISPs:
/routing bgp instance
add name=default as=65001 router-id=192.0.2.1

/routing bgp peer
add name=ISP1 remote-address=192.0.2.2 remote-as=64500
add name=ISP2 remote-address=198.51.100.2 remote-as=64501

/routing bgp network
add network=203.0.113.0/24

/routing filter rule
add chain=ISP1-in prefix=0.0.0.0/0 set-bgp-local-pref=200 action=accept comment="Prefer ISP1"
add chain=ISP2-in prefix=0.0.0.0/0 set-bgp-local-pref=100 action=accept comment="Backup via ISP2"

/routing bgp peer
set ISP1 in-filter=ISP1-in
set ISP2 in-filter=ISP2-in
Internet Exchange Point Participation
Configuration for connecting to an IXP:
/routing bgp instance
add name=default as=65001 router-id=192.0.2.1

/routing bgp peer
add name=IXP-RS remote-address=192.0.3.1 remote-as=65500 comment="IXP Route Server"

/routing filter rule
add chain=IXP-out prefix=203.0.113.0/24 action=accept

/routing bgp peer
set IXP-RS out-filter=IXP-out
Enterprise BGP Implementation
BGP configuration for an enterprise with dual ISP connections:
/routing bgp instance
add name=default as=65001 router-id=192.0.2.1

/routing bgp peer
add name=ISP1 remote-address=192.0.2.2 remote-as=64500
add name=ISP2 remote-address=198.51.100.2 remote-as=64501

/routing bgp network
add network=203.0.113.0/24

/ip route
add distance=1 dst-address=0.0.0.0/0 gateway=192.0.2.2 check-gateway=ping comment="Primary ISP"
add distance=2 dst-address=0.0.0.0/0 gateway=198.51.100.2 check-gateway=ping comment="Backup ISP"
Troubleshooting Common BGP Issues
Even with careful planning, BGP issues can arise. Here’s how to address common problems.
Peering Establishment Problems
If BGP sessions won’t establish:
- Check TCP Connectivity: Ensure that TCP port 179 is accessible.
/tool ping 192.0.2.2
/tool traceroute 192.0.2.2
- Verify AS Numbers: Confirm that AS numbers match what your peer expects.
/routing bgp peer print
- Check for Filters: Verify that no firewall rules are blocking BGP traffic.
/ip firewall filter print
- Authentication Issues: Verify MD5 authentication keys match.
/routing bgp peer print
Route Advertisement Issues
If routes aren’t being advertised correctly:
- Check Network Definitions: Verify networks are properly defined.
/routing bgp network print
- Verify Export Filters: Check if export filters are blocking announcements.
/routing filter rule print
- Check Next-Hop Accessibility: Ensure next-hop addresses are reachable.
/ip route print
- Verify Synchronization: Check if synchronization is enabled when needed.
/routing bgp network print
Path Selection Troubleshooting
If BGP isn’t selecting expected paths:
- Check BGP Attributes: Review attributes like LOCAL_PREF and AS_PATH.
/routing bgp advertisements print detail
- Verify Import Filters: Check if import filters are modifying attributes.
/routing filter rule print
- Check MED Values: Verify MED values for multiple connections to the same AS.
/routing bgp advertisements print detail
Case Study: Large-Scale BGP Deployment
Let’s examine a real-world deployment case study.
Network Architecture
A large ISP with the following components:
- AS65001
- 5 border routers with connections to upstream providers
- 3 Internet Exchange Point connections
- 20 internal routers
- 100+ customer networks to be announced
Implementation Approach
The implementation followed these steps:
- Core BGP Setup:
/routing bgp instance
add name=default as=65001 router-id=10.0.0.1 cluster-id=10.0.0.1
- Route Reflector Configuration:
/routing bgp peer
add name=RR-Client1 remote-address=10.0.0.2 remote-as=65001 route-reflect=yes
add name=RR-Client2 remote-address=10.0.0.3 remote-as=65001 route-reflect=yes
- External Peering Setup:
/routing bgp peer
add name=ISP1 remote-address=192.0.2.2 remote-as=64500
add name=ISP2 remote-address=198.51.100.2 remote-as=64501
add name=IXP1 remote-address=192.0.3.2 remote-as=65502
- Prefix Filtering Implementation:
/routing filter rule
add chain=customer-in prefix=203.0.113.0/24 prefix-length=24-32 action=accept
- Route Aggregation:
/routing bgp aggregate
add instance=default prefix=203.0.113.0/22 summary-only=yes
Lessons Learned
Key takeaways from this deployment:
- Resource Planning: The CCR1072 routers handled full BGP tables well, but required 4GB of RAM.
- Convergence Time: Using BFD reduced failover times from ~30 seconds to under 1 second.
- Filter Management: Centralized filter management was crucial for consistency.
- Monitoring: Proactive monitoring prevented most customer-impacting issues.
Performance Metrics
Before and after implementation:
- Before: 10+ minute failover times, manual route management
- After: Sub-second failover, automated route distribution, 99.999% uptime
Conclusion
This guide has walked you through the comprehensive process of configuring, optimizing, and troubleshooting BGP on MikroTik routers. By implementing the techniques discussed here, you can build a robust, reliable, and secure inter-provider routing infrastructure.
Key takeaways include:
- BGP is the foundation of internet routing between autonomous systems
- MikroTik provides enterprise-grade BGP capabilities at an accessible price point
- Proper planning and security considerations are essential before implementation
- Advanced features like route reflection and community-based policies enable scalable deployments
- Regular monitoring and troubleshooting routines maintain network health
As MikroTik continues to enhance RouterOS, we can expect even more powerful BGP features in future releases. The recently introduced RPKI validation, enhanced route filtering capabilities, and performance improvements demonstrate MikroTik’s commitment to providing advanced routing solutions.
Check our list of MikroTik guides.