MikroTik Boot Issues and Their Solutions
A router that will not boot causes outages and delays. This article describes common MikroTik boot problems, how to identify them, and how to fix them. It uses lists, commands, and short examples. Read the table of contents and jump to the relevant section when you work on a device.
Table of Contents
- Understanding the MikroTik Boot Process
- Issue #1: Stuck on “etherboot” or Waiting for Netinstall
- Issue #2: Random Boot Loops
- Issue #3: Bootloader or Firmware Incompatibility
- Issue #4: Power Supply Problems After Power Events
- Issue #5: Slow Boot in VMware / CHR
- Issue #6: Netinstall Fails or Hangs
- Issue #7: Severe Firmware Corruption or “Very Dead” Boards
- Community Tips and Quick Fixes
- Preventive Best Practices
- Field Troubleshooting Checklist
- Conclusion
Understanding the MikroTik Boot Process
Knowing the boot sequence helps you find where the device fails. Review the stages below before troubleshooting.
- Power-On Self-Test (POST)
- Performs basic hardware checks.
- Shows LED activity and basic console messages.
- RouterBOOT (bootloader)
- Initializes hardware and selects boot source.
- May present netboot options like Netinstall (etherboot) or boot from NAND/flash.
- RouterOS load
- Loads kernel and packages from flash or disk.
- Mounts the root filesystem and starts core services.
- Configuration apply
- Loads saved configuration and applies settings.
- Starts interface services and protocols.
If the router stops at a stage, use the relevant section below to diagnose and fix the issue.
Issue #1: Stuck on “etherboot” or Waiting for Netinstall
Symptoms
- Console shows
EtherbootorWaiting for Netinstall. - Router does not proceed to kernel or mount filesystem.
- Router appears only in Netinstall or BOOTP listings.
Common Causes
- RouterBOOT boot order set to network boot first.
- RouterOS files missing or corrupted on flash.
- Interrupted RouterOS upgrade left an incomplete installation.
Quick checks
- Attach a serial console and watch messages during power-on.
- Confirm that the boot menu appears.
- Confirm the router is not in a deliberate network-boot mode.
Step-by-step fix: Check boot order via console
- Connect a console cable (usually 115200 8N1).
- Power the device and press any key when RouterBOOT prompts.
- From the boot menu, select the option to boot from local storage (often “NAND” or “Flash”).
- If it boots, log in and clean up flash.
Step-by-step fix: Use Netinstall
Use Netinstall when local storage is corrupt or when the router stays in etherboot mode.
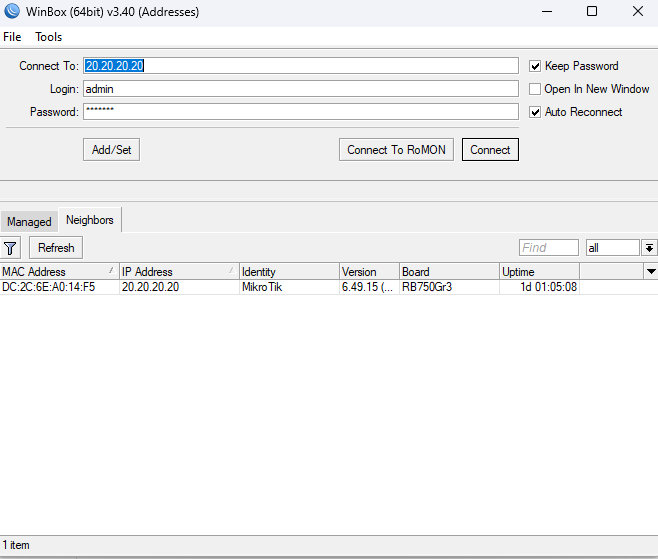
- Download Netinstall from the official MikroTik site.
- Run Netinstall on a PC. Prefer Windows for native support.
- Disable all other network interfaces on the PC.
- Assign a static IP to the PC in the target subnet (example:
192.168.88.2/24). - Connect PC to router via direct cable or unmanaged switch.
- Power the router while holding the reset button if required for the model.
- When the router appears in Netinstall, select it and install the chosen RouterOS package.
Commands to run after recovery
/system routerboard settings set boot-device=nand-only
/system reboot
Example
A CCR1009 entered etherboot mode after a failed downgrade. Netinstall re-installed RouterOS. Setting boot-device=nand-only prevented future accidental network boots.
Notes and tips
- Disable any TFTP/DHCP server on your PC during Netinstall.
- If Netinstall does not detect the router, try a different cable or port.
- If Netinstall fails repeatedly, try an older RouterOS build known to work on that model.
Issue #2: Random Boot Loops
Symptoms
- Router restarts repeatedly.
- Router stops during RouterOS load or soon after.
- Logs show kernel or filesystem errors when captured briefly.
Common Causes
- Flash memory is nearly full or full.
- Corrupted files in storage or a bad package.
- Power instability or hardware faults.
Checks
- Use a console to catch the device long enough to log in.
- Run storage and resource checks.
- Examine system logs for repeated error messages.
Commands to inspect storage
/file print
/system resource print
/log print where message~"error"
Fixes when you can log in
- Remove large files from
/file. Examples: old backups, debug captures, pcap files. - Disable unused packages to reduce startup load:
/system package disable/system reboot - Clear large log files or adjust logging to remote server.
Fixes when you cannot log in
- Use Netinstall to perform a clean install. This wipes the file store.
- After Netinstall, reinstall only required packages and monitoring agents.
- Monitor flash usage and adjust logging policies to avoid re-fill.
Hardware checks
- Test with a known-good power supply.
- If model supports diagnostics, run memory and storage checks.
- If flash shows wear or errors, consider board replacement.
Example
An hAP ac² in a small office kept rebooting. The device stored hourly pcap captures until flash reached zero free space. Removing captures and changing logging to remote syslog stopped the loop.
Issue #3: Bootloader or Firmware Incompatibility
Symptoms
- Router starts but halts before RouterOS loads.
- Router boots only after pressing reset on power-up.
- RouterBOOT prints errors or shortcuts to backup bootloader.
Common Causes
- RouterOS requires a newer RouterBOOT than installed.
- RouterBOOT update failed and left the region partially written.
- Corrupt bootloader region on flash or partial write due to power loss.
Checks
- Attach a serial console and capture RouterBOOT output at power-on.
- Note the RouterBOOT version string and any error lines.
- Check RouterOS release notes for RouterBOOT requirements for your version.
Step-by-step fixes
- If RouterOS sometimes boots:
- From RouterOS, run:
/system routerboard upgrade
/system reboot
- From RouterOS, run:
- If RouterBOOT always fails:
- Use the model-specific method to enter the backup bootloader (usually a reset-button procedure).
- Use Netinstall to reinstall RouterOS once backup bootloader allows network boot.
- If RouterBOOT is fully corrupted:
- Board-level recovery is required. Use an SPI or JTAG programmer with the exact image for the board revision.
Example
An RB4011 failed after a partial RouterBOOT write. The team used the backup bootloader procedure to netinstall RouterOS. Then they ran /system routerboard upgrade to update RouterBOOT safely.
Safety note
- Board-level flashing can void warranty and support.
- Use exact bootloader images for the precise RouterBoard revision.
Issue #4: Power Supply Problems After Power Events
Symptoms
- Router powers for a few seconds and then shuts down.
- LEDs blink then go dark during boot.
- Device behaves as if it loses power during the boot sequence.
Common Causes
- Power supply failure after a surge or outage.
- Replacement supply with wrong amperage or unstable output.
- Board regulator or protection components damaged by spikes.
Checks
- Measure the PSU output with a multimeter at idle and during boot.
- Swap to a known-good PSU that meets the device specs.
- Record any voltage droop or surge at power-on.
Fixes
- Replace the PSU with an approved unit of correct voltage and current rating.
- Install a UPS or line conditioner on critical sites.
- If on-board power components are damaged, replace the board or send it for repair.
Example
A field unit (Chateau 5G) stopped booting after a storm. The PSU showed no output. Replacing the PSU with a correct replacement allowed the router to boot normally. No board damage was found.
Issue #5: Slow Boot in VMware / CHR
Symptoms
- CHR VM takes several minutes to reach a usable prompt.
- Boot stalls at kernel load or device detection.
Common Causes
- Wrong VM image format or poor conversion from raw images.
- Virtual hardware settings incompatible with the guest.
- Nested virtualization or hypervisor conflicts (e.g., Hyper-V vs VMware).
Checks
- Use the official CHR OVA available from MikroTik for the hypervisor.
- Check VM hardware compatibility level and NIC type.
- Check hypervisor host logs for I/O error messages or driver delays.
Fixes
- Deploy the official CHR OVA instead of converted images.
- Use paravirtualized NICs recommended by the hypervisor (VMXNET3 on VMware, VirtIO on KVM).
- Disable Hyper-V on Windows if running VMware Workstation and experiencing slow boots.
- Allocate sufficient CPU and RAM for the workload. Example: start with 1 vCPU and 1 GB RAM, then increase if needed.
Example
A CHR instance on ESXi booted in over 3 minutes from a converted raw image. Re-deploying the official OVA and changing the NIC to VMXNET3 reduced boot time to under 30 seconds.
Issue #6: Netinstall Fails or Hangs
Symptoms
- Router appears in Netinstall but installation never completes.
- Netinstall stalls during file transfer.
- Netinstall reports timeouts or device not responding.
Common Causes
- Other active network interfaces on the PC cause conflicts.
- Firewall or antivirus software blocks Netinstall traffic.
- Wrong IP or subnet settings on the PC.
- Managed switch features (STP, VLAN) between PC and router interfere with BOOTP transfer.
Recommended Netinstall setup
- Use a PC with a single active Ethernet adapter.
- Disable Wi-Fi, virtual adapters, and VPNs.
- Assign a static IP (example:
192.168.88.2/24). - Run Netinstall as Administrator or with root privileges.
- Temporarily disable firewall and antivirus on the PC.
- Use an unmanaged switch between PC and router where possible.
Troubleshooting steps
- Verify link LEDs on the PC and router.
- Try another Ethernet cable and port.
- Check ARP entries on the PC to confirm the router’s BOOTP MAC is visible (
arp -a). - If transfer fails, try an older RouterOS package that is known to work for the model.
- If Netinstall times out at the same point, restart both PC and router and repeat the steps.
Example
A laptop running virtual adapters would not complete Netinstall. Disabling the virtual adapters and assigning a static IP allowed Netinstall to complete successfully.
Issue #7: Severe Firmware Corruption or “Very Dead” Boards
Symptoms
- Only the power LED lights. No serial output appears.
- Reset and Netinstall do not detect the device.
- Board is unresponsive to any input.
Common Causes
- Bootloader region erased or corrupted beyond software recovery.
- NAND or flash chip physically failed.
- Severe board damage from surge or mechanical fault.
Recovery options
- Basic power checks
- Measure supply voltages at the board if you have the skill and tools.
- Swap in a known-good PSU and test again.
- Console checks
- Try different console adapters and baud rates (try 9600 and 115200).
- Try different cable wiring in case the pinout differs by model.
- Board-level recovery
- Use an SPI or JTAG programmer to re-flash the flash chip.
- This requires the exact image file for your board revision.
- Replace board
- If the flash chip is dead, replace the board or the RouterBoard module.
Warning
- Hardware reprogramming can void support or warranty.
- Do not attempt chip-level recovery without backup images and the correct toolchain.
Example
An RB750Gr3 showed no serial output and no Netinstall presence. Diagnostics found a failed flash chip. The team replaced the board after confirming chip failure.
Community Tips and Quick Fixes
Field-tested tips that often save time.
- Keep known-good RouterOS images
- Maintain a small library of tested images per model and revision.
- Disable other network services on the Netinstall PC
- Host TFTP or DHCP can interfere with Netinstall and BOOTP.
- Use short, good-quality console cables
- Long or poor cables cause missed characters at boot.
- Capture boot logs
- Record console output during boot for later review and posting to forums.
- Document RouterBOOT and RouterOS versions
- Note exact strings for faster troubleshooting and matching to release notes.
Preventive Best Practices
Follow these actions to reduce the chance of boot failures.
- Keep RouterBOOT and RouterOS updated
- Check release notes and model compatibility before upgrading.
- Test upgrades in a lab environment where possible.
- Monitor flash usage
- Run
/file printand/system resource printregularly. - Keep at least 10% free flash on embedded devices.
- Run
- Use proper power protection
- Install UPS units for critical routers.
- Use surge protection on edge devices exposed to lightning or unstable power.
- Keep recovery tools ready
- Netinstall media, official RouterOS images, and console cables.
- A boot kit with spare PSU and tested routerboard images speeds recovery.
- Back up configurations
- Export configs regularly with timestamps and store them off-device.
- Keep saved scripts and license notes linked to the board serial or RouterBoard ID.
- Record hardware revisions
- Board revision and RouterBoard ID matter for correct bootloader images.
Field Troubleshooting Checklist
Use this on-site checklist when you work on a device. Proceed top to bottom.
- Power
- Check AC input and PSU output.
- Swap to a known-good PSU.
- Measure board voltages if you can do so safely.
- Console
- Attach console and capture boot messages.
- Try different baud rates and adapters if no output appears.
- Bootloader
- Attempt to enter RouterBOOT menu.
- Record RouterBOOT version and errors.
- Netinstall
- Ensure the router appears in Netinstall.
- Disable extra NICs and firewall on the PC.
- Software
- Try a known stable RouterOS build if a recent upgrade triggered issues.
- After reinstall, run
/system routerboard upgrade.
- Hardware
- If flash is physically damaged, plan board replacement or chip re-flash.
Conclusion
Most MikroTik boot issues fall into a small set of root causes: power, bootloader, storage, or Netinstall problems. Use a methodical process:
- Check power first.
- Check the console and RouterBOOT next.
- Use Netinstall to recover software when flash is corrupt.
- Replace board only after ruling out software and power problems.
Keep recovery tools ready, document versions, and back up configs. These steps reduce downtime and speed recovery.
Check our list of MikroTik guides.
Note: This article assumes you have permission to perform maintenance on devices. Commands and procedures require appropriate access. Board-level recovery and chip flashing require hardware skills and may void support.
