MikroTik Netinstall: Automating RouterOS Recovery and Installation
MikroTik Netinstall solves these problems. This utility reinstalls RouterOS over the network when standard access methods fail.
What This Guide Covers
- Complete Netinstall process from preparation to verification
- Automation scripts for mass deployments
- Troubleshooting procedures for common failures
- Enterprise-grade deployment strategies
- Real configuration examples you can use immediately
Target Audience
- Network engineers managing MikroTik infrastructure
- Systems administrators responsible for router deployments
- MSP technicians handling multiple client networks
- IT professionals preparing disaster recovery procedures
What Is MikroTik Netinstall and How Does It Work?
Understanding the Netinstall Process
Netinstall is a Windows-based utility that reinstalls RouterOS on MikroTik devices via Ethernet. The process bypasses the existing operating system entirely.
Technical Process Flow
- MikroTik device enters boot recovery mode
- RouterBOOT sends BOOTP broadcast requests
- Netinstall server responds with boot parameters
- Device downloads RouterOS packages via TFTP
- RouterBOOT writes packages to flash storage
- Device reboots with fresh RouterOS installation
Supported Platforms
| Platform | Support Status | Notes |
|---|---|---|
| Windows 10/11 | Native | Recommended platform |
| Windows Server | Native | Full functionality |
| Linux | Via Wine | Requires additional configuration |
| macOS | Via Wine/VM | Not officially supported |
When to Use MikroTik Netinstall for Recovery
Primary Use Cases
- Corrupted RouterOS: Failed upgrades or flash storage errors
- Lost Credentials: Forgotten admin passwords with no backup
- Version Downgrade: Rolling back to previous RouterOS versions
- Mass Deployment: Provisioning multiple devices simultaneously
- Complete Reset: Removing all configuration and starting fresh
- Architecture Change: Switching between RouterOS package types
Netinstall vs. Other Recovery Methods
| Method | Preserves Config | Requires Network | Fixes Corrupt OS | Changes Version |
|---|---|---|---|---|
| Reset Button (soft) | No | No | No | No |
| Reset Button (hard) | No | No | No | No |
| Netinstall | Optional | Yes | Yes | Yes |
| System > Reset Configuration | No | No | No | No |
Prerequisites for MikroTik Netinstall Setup
Hardware Requirements
Essential Equipment
- Windows Computer: Windows 10 or later recommended
- Ethernet Port: Built-in NIC or USB adapter
- Ethernet Cable: Cat5e or better, direct connection
- Power Supply: Appropriate adapter for target device
Critical Hardware Considerations
- Direct Connection Required: Connect computer directly to MikroTik device. Managed switches block BOOTP traffic by default.
- PoE Devices: Use PoE injector or power adapter for devices requiring Power over Ethernet
- Serial Console: Optional but useful for troubleshooting boot issues
Software Requirements
Required Downloads
- Netinstall Utility: Download from
mikrotik.com/download - RouterOS Packages: Match architecture to target device
RouterOS Architecture Reference
| Architecture | Device Examples | Package Name |
|---|---|---|
| ARM | hAP ac², cAP ac, RB4011 | routeros-arm-7.x.npk |
| ARM64 | CCR2004, CCR2116, CCR2216 | routeros-arm64-7.x.npk |
| MIPSBE | hAP lite, RB750, RB2011 | routeros-mipsbe-7.x.npk |
| MMIPS | hEX, hAP ac³, RB760iGS | routeros-mmips-7.x.npk |
| TILE | CCR1009, CCR1016, CCR1036, CCR1072 | routeros-tile-7.x.npk |
| x86 | CHR, RB230, x86 installations | routeros-x86-7.x.npk |
Windows Firewall Configuration
Netinstall requires these ports:
- UDP 67: BOOTP/DHCP server
- UDP 68: BOOTP/DHCP client
- UDP 69: TFTP transfer
- TCP/UDP 5000: Netinstall communication
PowerShell Commands to Create Firewall Rules
# Run PowerShell as Administrator
New-NetFirewallRule -DisplayName "Netinstall BOOTP" -Direction Inbound -Protocol UDP -LocalPort 67,68 -Action Allow
New-NetFirewallRule -DisplayName "Netinstall TFTP" -Direction Inbound -Protocol UDP -LocalPort 69 -Action Allow
New-NetFirewallRule -DisplayName "Netinstall Communication" -Direction Inbound -Protocol UDP -LocalPort 5000 -Action Allow
New-NetFirewallRule -DisplayName "Netinstall Communication TCP" -Direction Inbound -Protocol TCP -LocalPort 5000 -Action Allow
Network Configuration Essentials
Static IP Configuration for Host Computer
- Open Network Adapter Settings
- Select the Ethernet adapter connected to MikroTik
- Open Properties > Internet Protocol Version 4
- Configure static IP settings
Recommended IP Configuration
IP Address: 192.168.88.2
Subnet Mask: 255.255.255.0
Default Gateway: (leave blank)
DNS: (leave blank)
Network Preparation Checklist
- ☐ Disable all network adapters except the one connected to MikroTik
- ☐ Disable Wi-Fi adapter
- ☐ Disable VPN software
- ☐ Stop any DHCP server software running on the computer
- ☐ Verify no other devices on the same network segment
Step-by-Step Guide: Manual MikroTik Netinstall Process
Preparing the Netinstall Environment
1: Download Required Files
- Navigate to
https://mikrotik.com/download - Download Netinstall utility (matches your RouterOS target version)
- Download RouterOS Main Package for target architecture
- Download additional packages if needed (wireless, gps, etc.)
- Extract Netinstall ZIP to a dedicated folder
2: Organize Files
C:\Netinstall\
├── netinstall.exe
├── netinstall-cli.exe
├── routeros-arm-7.14.npk
├── routeros-mmips-7.14.npk
├── routeros-mipsbe-7.14.npk
└── wireless-7.14-arm.npk
3: Run Netinstall as Administrator
- Right-click
netinstall.exe - Select “Run as administrator”
- Accept any Windows security prompts
Configuring Netinstall Application Settings
Boot Server Configuration
- Click “Net booting” button
- Check “Boot Server enabled”
- Enter Client IP address:
192.168.88.3 - Click “OK”
Netinstall Configuration Options
| Option | Description | Recommended Setting |
|---|---|---|
| Boot Server enabled | Activates BOOTP server | Enabled |
| Client IP address | IP assigned to MikroTik during boot | 192.168.88.3 |
| Keep old configuration | Preserves existing config after install | Disabled for recovery |
| Apply default config | Loads manufacturer defaults | Enabled |
Select RouterOS Packages
- Click “Browse” button
- Navigate to folder containing .npk files
- Select the folder (not individual files)
- Click “OK”
Booting MikroTik Device into Netinstall Mode
Method 1: Reset Button Method (Most Common)
- Disconnect power from MikroTik device
- Press and hold the Reset button
- Connect power while holding Reset button
- Watch for LED indicator pattern
- Release button when LED starts flashing
LED Indicator Patterns by Device Series
| Device Series | Boot Indicator | Netinstall Ready |
|---|---|---|
| hAP series | USR LED flashes | Release after 5+ seconds |
| RB750/760 | ACT LED flashes | Release when flashing |
| CCR series | All port LEDs flash | Release after pattern change |
| CRS series | SYS LED behavior varies | Check model documentation |
Method 2: RouterBOOT Configuration via Serial Console
- Connect serial cable to device console port
- Open terminal program (PuTTY, Tera Term)
- Configure serial settings: 115200 baud, 8N1
- Power on device and press any key during boot
- Enter RouterBOOT menu
RouterBOOT Menu Options
RouterBOOT booter 7.14

What do you want to configure?
   d - boot delay
   k - boot key
   s - serial console
   n - silent boot
   o - boot device
   u - cpu mode
   f - try cpu frequency
   c - keep cpu frequency
   r - reset configuration
   e - format storage
   g - upgrade firmware
   i - regulation domain information
   l - license information
   p - boot protocol
   b - booter options
   t - do memory testing
   x - exit setup

your choice:
Enable Network Boot via Serial
your choice: o

Select boot device:
   e - boot over Ethernet
   n - boot from NAND, if fail then Ethernet
   1 - boot Ethernet once, then NAND
   2 - boot from NAND only
   o - boot from NAND only, but allow open mode
   b - boot chosen device
   f - boot Flash Configure Mode
   3 - boot Flash Configure Mode once, then NAND

your choice: e
Method 3: Winbox Etherboot (When Device Is Accessible)
- Connect to device via Winbox
- Navigate to System > RouterBOARD
- Click “Settings”
- Set “Boot Device” to “try-ethernet-once-then-nand”
- Click “OK”
- Reboot device
Completing the RouterOS Installation
Device Detection
- Watch Netinstall window for device appearance
- Device shows MAC address and model information
- Status column shows “Waiting”
Installation Process
- Select the detected device in Netinstall
- Check boxes for packages to install
- Verify “routeros-[arch]” package is selected
- Click “Install” button
- Monitor progress bar
- Wait for “Installation finished successfully” message
Post-Installation Verification
- Device reboots automatically after installation
- Wait 60-90 seconds for boot completion
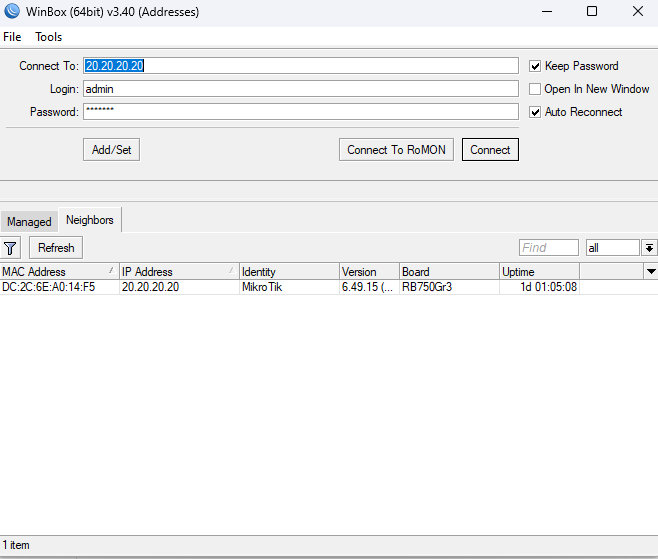
- Scan for device in Winbox (Neighbors tab)
- Connect using default credentials
- Verify RouterOS version in System > Resources
Default Login Credentials
| Field | Value |
|---|---|
| Username | admin |
| Password | (blank – no password) |
| Default IP | 192.168.88.1 |
Automating MikroTik Netinstall for Enterprise Deployments
Why Automate RouterOS Installation?
Business Justification
- Time Reduction: Manual installation takes 5-10 minutes per device. Automation reduces active time to under 1 minute.
- Consistency: Every device receives identical configuration baseline
- Error Reduction: Eliminates typos and forgotten configuration steps
- Documentation: Scripts serve as executable documentation
- Scalability: Deploy 100 devices with same effort as 10
Using Netinstall Command-Line Interface
Netinstall-CLI Syntax
netinstall-cli.exe [options]

Options:
  -r                    Reset configuration
  -k                    Keep old configuration
  -s <script>           Apply script after installation
  -b                    Set boot protocol back to NAND after install
  -a <address>          Set client IP address
  -i <interface>        Specify network interface
  -p <packages>         Path to package directory
Basic Automated Installation Example
netinstall-cli.exe -r -a 192.168.88.3 -p "C:\Netinstall\packages"Windows Batch Script for Automated Netinstall
Basic Batch Automation Script
@echo off
REM MikroTik Netinstall Automation Script
REM Version: 1.0
REM Purpose: Automated RouterOS installation with configuration

SET NETINSTALL_PATH=C:\Netinstall
SET PACKAGE_PATH=C:\Netinstall\packages
SET CONFIG_SCRIPT=C:\Netinstall\configs\base-config.rsc
SET CLIENT_IP=192.168.88.3
SET LOG_FILE=C:\Netinstall\logs\install_%date:~-4,4%%date:~-10,2%%date:~-7,2%.log

echo ====================================== >> %LOG_FILE%
echo Netinstall Started: %date% %time% >> %LOG_FILE%
echo ====================================== >> %LOG_FILE%

REM Run Netinstall CLI
%NETINSTALL_PATH%\netinstall-cli.exe -r -a %CLIENT_IP% -s %CONFIG_SCRIPT% -p %PACKAGE_PATH%

IF %ERRORLEVEL% EQU 0 (
    echo SUCCESS: Installation completed >> %LOG_FILE%
) ELSE (
    echo ERROR: Installation failed with code %ERRORLEVEL% >> %LOG_FILE%
)

echo Installation finished: %time% >> %LOG_FILE%
PowerShell Automation with Logging
# MikroTik-Netinstall-Automation.ps1
# Automated RouterOS deployment with detailed logging

param(
    [string]$PackagePath = "C:\Netinstall\packages",
    [string]$ConfigScript = "C:\Netinstall\configs\base-config.rsc",
    [string]$ClientIP = "192.168.88.3",
    [string]$LogPath = "C:\Netinstall\logs"
)

# Create log directory if not exists
if (!(Test-Path $LogPath)) {
    New-Item -ItemType Directory -Path $LogPath -Force
}

$LogFile = Join-Path $LogPath "netinstall_$(Get-Date -Format 'yyyyMMdd_HHmmss').log"

function Write-Log {
    param([string]$Message)
    $Timestamp = Get-Date -Format "yyyy-MM-dd HH:mm:ss"
    "$Timestamp - $Message" | Tee-Object -FilePath $LogFile -Append
}

Write-Log "Starting Netinstall automation"
Write-Log "Package Path: $PackagePath"
Write-Log "Config Script: $ConfigScript"
Write-Log "Client IP: $ClientIP"

# Verify prerequisites
if (!(Test-Path $PackagePath)) {
    Write-Log "ERROR: Package path not found"
    exit 1
}

if (!(Test-Path $ConfigScript)) {
    Write-Log "WARNING: Config script not found, proceeding without configuration"
    $ConfigParam = ""
} else {
    $ConfigParam = "-s `"$ConfigScript`""
}

# Run Netinstall
Write-Log "Executing Netinstall-CLI..."
$NetinstallPath = "C:\Netinstall\netinstall-cli.exe"
$Arguments = "-r -a $ClientIP -p `"$PackagePath`" $ConfigParam"

$Process = Start-Process -FilePath $NetinstallPath -ArgumentList $Arguments -Wait -PassThru -NoNewWindow

if ($Process.ExitCode -eq 0) {
    Write-Log "SUCCESS: Installation completed"
} else {
    Write-Log "ERROR: Installation failed with exit code $($Process.ExitCode)"
}

Write-Log "Netinstall automation finished"
Pre-Configuration Scripts for Netinstall
Basic Configuration Script (base-config.rsc)
# RouterOS Base Configuration Script
# Applied automatically during Netinstall

# Set system identity
/system identity set name="MKT-NEW-DEVICE"

# Configure admin password (CHANGE THIS!)
/user set [find name=admin] password="YourSecurePassword123!"

# Create backup admin account
/user add name=netadmin password="BackupAdminPass456!" group=full

# Disable unnecessary services
/ip service
set telnet disabled=yes
set ftp disabled=yes
set www disabled=no
set ssh disabled=no port=22
set api disabled=yes
set winbox disabled=no port=8291
set api-ssl disabled=yes

# Configure management IP
/ip address add address=192.168.88.1/24 interface=bridge comment="Management"

# Configure DNS
/ip dns set servers=8.8.8.8,8.8.4.4 allow-remote-requests=yes

# Set timezone
/system clock set time-zone-name=America/New_York

# Enable NTP client
/system ntp client set enabled=yes
/system ntp client servers add address=time.google.com

# Configure logging
/system logging action set memory memory-lines=1000
/system logging add topics=critical action=memory
/system logging add topics=error action=memory

# Basic firewall (INPUT chain)
/ip firewall filter
add chain=input action=accept connection-state=established,related comment="Accept established"
add chain=input action=drop connection-state=invalid comment="Drop invalid"
add chain=input action=accept protocol=icmp comment="Accept ICMP"
add chain=input action=accept src-address=192.168.88.0/24 comment="Accept from LAN"
add chain=input action=drop in-interface-list=WAN comment="Drop from WAN"
Advanced Configuration with Variables (dynamic-config.rsc)
# Dynamic RouterOS Configuration
# Uses environment variables for site-specific settings

# Retrieve MAC address for unique identification
:local macaddr [/interface ethernet get [find default-name=ether1] mac-address]
:local lastoctets [:pick $macaddr 12 17]
:local hostname ("MKT-" . $lastoctets)

# Set dynamic identity
/system identity set name=$hostname

# Configure logging to remote syslog
/system logging action add name=remote target=remote remote=10.0.0.100 remote-port=514
/system logging add topics=critical,error,warning action=remote

# Enable SNMP for monitoring
/snmp set enabled=yes contact="noc@company.com" location="Datacenter-Rack-A1"
/snmp community set [find name=public] addresses=10.0.0.0/8

# Configure automatic backup
/system scheduler add name=daily-backup interval=1d \
    on-event="/system backup save name=(\$[/system identity get name] . \"-\" . \
    [:pick [/system clock get date] 0 11])" start-time=02:00:00
Mass Deployment Strategies
Batch Processing Multiple Devices
# Mass-Deployment.ps1
# Process multiple devices sequentially

$DeviceQueue = @(
    @{MAC="AA:BB:CC:DD:EE:01"; Config="branch-office.rsc"},
    @{MAC="AA:BB:CC:DD:EE:02"; Config="branch-office.rsc"},
    @{MAC="AA:BB:CC:DD:EE:03"; Config="warehouse.rsc"}
)

$Results = @()

foreach ($Device in $DeviceQueue) {
    Write-Host "Waiting for device $($Device.MAC)..."

    # Wait for device to appear (implement detection logic)
    $Timeout = 300  # 5 minutes
    $Elapsed = 0

    while ($Elapsed -lt $Timeout) {
        # Check if device is detected
        # This requires custom detection implementation
        Start-Sleep -Seconds 5
        $Elapsed += 5
    }

    # Install device
    $ConfigPath = "C:\Netinstall\configs\$($Device.Config)"
    .\Install-SingleDevice.ps1 -ConfigScript $ConfigPath

    $Results += @{
        MAC = $Device.MAC
        Time = Get-Date
        Status = "Completed"
    }
}

# Export results
$Results | Export-Csv -Path "C:\Netinstall\logs\deployment-results.csv"
Deployment VLAN Setup
| Component | Configuration | Purpose |
|---|---|---|
| VLAN ID | 999 | Isolated deployment network |
| Subnet | 10.255.255.0/24 | Non-production address space |
| Netinstall Server | 10.255.255.1 | Deployment workstation |
| Client Range | 10.255.255.10-250 | Device addressing during install |
Automating Post-Installation Configuration
RouterOS Auto-Configuration Files
Configuration File Structure
# site-template.rsc
# Enterprise site configuration template

#-----------------------------------------
# VARIABLES - Modify per deployment
#-----------------------------------------
:local siteName "BRANCH-001"
:local wanIP "203.0.113.10/30"
:local wanGateway "203.0.113.9"
:local lanSubnet "10.1.1.0/24"
:local managementVLAN 100
:local voiceVLAN 200
:local dataVLAN 300

#-----------------------------------------
# INTERFACES
#-----------------------------------------
/interface bridge add name=bridge-lan
/interface vlan add interface=bridge-lan name=vlan-mgmt vlan-id=$managementVLAN
/interface vlan add interface=bridge-lan name=vlan-voice vlan-id=$voiceVLAN
/interface vlan add interface=bridge-lan name=vlan-data vlan-id=$dataVLAN

#-----------------------------------------
# IP ADDRESSING
#-----------------------------------------
/ip address
add address=$wanIP interface=ether1 comment="WAN"
add address="10.1.1.1/24" interface=vlan-data comment="Data VLAN"
add address="10.1.2.1/24" interface=vlan-voice comment="Voice VLAN"
add address="10.1.0.1/24" interface=vlan-mgmt comment="Management VLAN"

#-----------------------------------------
# ROUTING
#-----------------------------------------
/ip route add gateway=$wanGateway comment="Default Route"

#-----------------------------------------
# DHCP SERVER
#-----------------------------------------
/ip pool
add name=pool-data ranges=10.1.1.100-10.1.1.250
add name=pool-voice ranges=10.1.2.100-10.1.2.250

/ip dhcp-server
add address-pool=pool-data interface=vlan-data name=dhcp-data
add address-pool=pool-voice interface=vlan-voice name=dhcp-voice

/ip dhcp-server network
add address=10.1.1.0/24 gateway=10.1.1.1 dns-server=10.1.1.1
add address=10.1.2.0/24 gateway=10.1.2.1 dns-server=10.1.2.1 \
    dhcp-option=tftp-server-name,voip-server.company.com

#-----------------------------------------
# NAT
#-----------------------------------------
/ip firewall nat
add chain=srcnat out-interface=ether1 action=masquerade comment="NAT"

#-----------------------------------------
# FIREWALL
#-----------------------------------------
/ip firewall filter
# Input Chain
add chain=input action=accept connection-state=established,related
add chain=input action=drop connection-state=invalid
add chain=input action=accept protocol=icmp
add chain=input action=accept src-address=10.1.0.0/24 comment="Management access"
add chain=input action=drop in-interface=ether1

# Forward Chain
add chain=forward action=accept connection-state=established,related
add chain=forward action=drop connection-state=invalid
add chain=forward action=accept src-address=10.1.0.0/16 out-interface=ether1
add chain=forward action=drop

#-----------------------------------------
# SYSTEM
#-----------------------------------------
/system identity set name=$siteName

# Management access lists
/ip firewall address-list
add list=management address=10.0.0.0/8 comment="Internal networks"
add list=management address=192.168.0.0/16 comment="Internal networks"

# Secure services
/ip service
set telnet disabled=yes
set ftp disabled=yes
set api disabled=yes
set api-ssl disabled=yes
set winbox address=10.0.0.0/8
set ssh address=10.0.0.0/8

# SNMP
/snmp set enabled=yes trap-community=public
/snmp community set [find] addresses=10.0.0.0/8
Integration with Ansible
Ansible Inventory File
# inventory/mikrotik.yml
all:
  children:
    mikrotik_routers:
      hosts:
        branch-001:
          ansible_host: 10.1.0.1
          site_name: "BRANCH-001"
          wan_ip: "203.0.113.10/30"
        branch-002:
          ansible_host: 10.2.0.1
          site_name: "BRANCH-002"
          wan_ip: "203.0.113.14/30"
      vars:
        ansible_connection: network_cli
        ansible_network_os: routeros
        ansible_user: admin
        ansible_password: "{{ vault_mikrotik_password }}"
Ansible Playbook for Post-Installation Configuration
# playbooks/mikrotik-configure.yml
---
- name: Configure MikroTik devices post-Netinstall
  hosts: mikrotik_routers
  gather_facts: no

  tasks:
    - name: Set system identity
      community.routeros.command:
        commands:
          - /system identity set name={{ site_name }}

    - name: Configure NTP
      community.routeros.command:
        commands:
          - /system ntp client set enabled=yes
          - /system ntp client servers add address=time.google.com

    - name: Configure SNMP
      community.routeros.command:
        commands:
          - /snmp set enabled=yes contact="noc@company.com" location="{{ site_name }}"
          - /snmp community set [find name=public] addresses=10.0.0.0/8

    - name: Configure syslog
      community.routeros.command:
        commands:
          - /system logging action add name=remote target=remote remote=10.0.0.50 remote-port=514
          - /system logging add topics=critical,error action=remote

    - name: Create backup
      community.routeros.command:
        commands:
          - /system backup save name={{ site_name }}-initial

    - name: Export configuration
      community.routeros.command:
        commands:
          - /export file={{ site_name }}-config
      register: config_export
Zero-Touch Provisioning Workflow
Complete ZTP Process
- Stage 1 – Netinstall: Deploy base RouterOS
- Stage 2 – Bootstrap Script: Apply minimal config via Netinstall -s flag
- Stage 3 – DHCP Options: Device receives management server address
- Stage 4 – Configuration Pull: Device fetches full config from server
- Stage 5 – Validation: Device reports status to management system
Bootstrap Script for ZTP (bootstrap.rsc)
# bootstrap.rsc
# Minimal configuration for ZTP initialization

# Set temporary identity
/system identity set name="ZTP-PENDING"

# Configure admin credentials
/user set [find name=admin] password="TempPassword123!"

# Enable DHCP client on management interface
/ip dhcp-client add interface=ether1 disabled=no add-default-route=yes use-peer-dns=yes

# Create scheduler to fetch configuration
/system scheduler add name=ztp-fetch interval=1m on-event={
    :local configServer [/ip dhcp-client get [find interface=ether1] value-name=dhcp-server-address]
    :if ([:len $configServer] > 0) do={
        /tool fetch url="http://$configServer/configs/config.rsc" dst-path=site-config.rsc
        :if ([:len [/file find name=site-config.rsc]] > 0) do={
            /import file-name=site-config.rsc
            /system scheduler remove [find name=ztp-fetch]
            /system identity set name="ZTP-COMPLETE"
        }
    }
} start-time=startup

# Enable discovery for initial management
/ip neighbor discovery-settings set discover-interface-list=all
Troubleshooting Common MikroTik Netinstall Issues
Device Not Detected by Netinstall
Diagnostic Checklist
| Issue | Cause | Solution |
|---|---|---|
| Device never appears in list | Windows Firewall blocking BOOTP | Disable firewall or add UDP 67,68,69 rules |
| Device appears then disappears | Multiple network adapters active | Disable all adapters except connected one |
| Wrong IP assigned to device | Another DHCP server responding | Disconnect from corporate network |
| Device not entering boot mode | Incorrect reset button timing | Review device-specific boot procedure |
| Connection through switch fails | Switch blocking BOOTP broadcast | Connect directly to computer |
Verify Network Adapter Configuration
# PowerShell: Check active adapters
Get-NetAdapter | Where-Object Status -eq "Up"

# PowerShell: Verify IP configuration
Get-NetIPAddress -InterfaceAlias "Ethernet" -AddressFamily IPv4

# Expected output for Netinstall:
# IPAddress         : 192.168.88.2
# PrefixLength      : 24
# InterfaceAlias    : Ethernet
Capture BOOTP Traffic for Diagnosis
# Using Wireshark filter
bootp or tftp

# Expected packets:
# 1. BOOTP Request from MikroTik (broadcast)
# 2. BOOTP Reply from Netinstall server
# 3. TFTP Read Request from MikroTik
# 4. TFTP Data transfers
Installation Fails or Hangs
Common Failure Scenarios
| Symptom | Cause | Resolution |
|---|---|---|
| Progress bar stops at start | Package architecture mismatch | Verify correct package for device model |
| Fails at 50-60% | Corrupted package file | Re-download packages from MikroTik |
| Completes but device won’t boot | Incompatible RouterOS version | Try older RouterOS version |
| “Not enough space” error | Too many packages selected | Install only required packages |
| Installation keeps restarting | Power supply issues | Use known-good power adapter |
Verify Package Integrity
# PowerShell: Calculate file hash
Get-FileHash -Algorithm SHA256 -Path "routeros-arm-7.14.npk"

# Compare with checksums from mikrotik.com download page
Device Architecture Lookup
# Connect via serial console during boot to see architecture
# Or check model against MikroTik documentation

# Common model to architecture mappings:
# hAP ac² (RBD52G-5HacD2HnD) = ARM
# hEX (RB750Gr3) = MMIPS
# hAP lite (RB941-2nD) = MIPSBE
# CCR1036 = TILE
# CCR2004 = ARM64
RouterOS Boots but Configuration Missing
Configuration Preservation Options
- “Keep old configuration” checked: Existing config preserved after install
- “Keep old configuration” unchecked: Fresh install, default config applied
- Config script provided: Custom config applied during install
Verify License Status
# After installation, check license:
/system license print

# Expected output for RouterBOARD devices:
#   software-id: XXXX-XXXX
#   level: 4
#   features:

# If license shows level 0 or missing:
# 1. Device may have corrupted license storage
# 2. Contact MikroTik support with original purchase proof
Network-Specific Troubleshooting
Multiple NIC Issues
# PowerShell: Disable all adapters except target
Get-NetAdapter | Where-Object Name -ne "Ethernet" | Disable-NetAdapter -Confirm:$false

# Re-enable after Netinstall complete
Get-NetAdapter | Enable-NetAdapter -Confirm:$false
Virtual Machine Considerations
- VMware Workstation: Use bridged networking mode
- VirtualBox: Select bridged adapter, allow promiscuous mode
- Hyper-V: Use external virtual switch, enable MAC spoofing
USB Ethernet Adapter Issues
- Some adapters don’t support raw BOOTP traffic
- Recommended adapters: Intel, Realtek chipsets
- Avoid adapters requiring special drivers during clean Windows install
Advanced Netinstall Techniques and Best Practices
Version Management and Rollback
Maintain RouterOS Package Repository
C:\Netinstall\packages\
├── 7.14\
│   ├── routeros-arm-7.14.npk
│   ├── routeros-mmips-7.14.npk
│   ├── routeros-mipsbe-7.14.npk
│   └── wireless-7.14-arm.npk
├── 7.13.5\
│   ├── routeros-arm-7.13.5.npk
│   └── ...
├── 6.49.10\ (Long-term branch)
│   ├── routeros-arm-6.49.10.npk
│   └── ...
└── current -> 7.14\
Version Testing Procedure
- Download new RouterOS version to staging directory
- Install on test device using Netinstall
- Run validation tests (connectivity, features, performance)
- Document any issues or incompatibilities
- Move to production repository if approved
- Update “current” symbolic link
Downgrade Considerations
- Configuration Compatibility: Older versions may not support new features
- RouterBOOT Updates: Some updates cannot be reversed
- License Requirements: Some features require minimum versions
- Best Practice: Export configuration before downgrade
Security Best Practices
Deployment Network Isolation
# Physical isolation requirements:
# - Dedicated switch for deployment VLAN
# - No routing to production networks during install
# - Firewall blocking all external access

# Network diagram:
# [Netinstall PC] ---- [Isolated Switch] ---- [New MikroTik Devices]
#                              |
#                      (No uplink during install)
Credential Management
- Never hardcode production passwords in scripts stored in plain text
- Use environment variables for sensitive data
- Rotate temporary deployment passwords after installation
- Store configuration scripts in access-controlled repositories
Secure Configuration Script Template
# secure-bootstrap.rsc
# Uses random password generation

:local randomPass [:pick ([/certificate scep-server otp generate duration=0 as-value]->"password") 0 16]

# Set password (will be changed by management system after deployment)
/user set [find name=admin] password=$randomPass

# Log the temporary password (retrieve via serial or initial connection)
:log warning ("Temporary admin password: " . $randomPass)

# Configure password to expire
/user set [find name=admin] comment="Password expires: temporary deployment"
Creating a Portable Netinstall Kit
Hardware Kit Contents
- Laptop: Windows 10/11 with Ethernet port or USB adapter
- USB Ethernet Adapter: Backup adapter (Intel or Realtek chipset)
- Ethernet Cables: Multiple Cat6 cables (1m, 2m lengths)
- PoE Injector: For PoE-dependent devices
- USB-to-Serial Adapter: For console access
- RJ45 Console Cable: For CCR devices with serial port
- Power Adapters: Common MikroTik power supply types
- USB Drive: Contains Netinstall, packages, configurations
Software Preparation
# USB drive structure:
E:\MikroTik-Recovery\
├── Netinstall\
│   ├── netinstall-7.14.zip
│   ├── netinstall-7.13.zip
│   └── netinstall-6.49.zip
├── Packages\
│   ├── 7.14\
│   ├── 7.13.5\
│   └── 6.49.10\
├── Configs\
│   ├── base-config.rsc
│   ├── branch-template.rsc
│   └── recovery-minimal.rsc
├── Scripts\
│   ├── Install-RouterOS.ps1
│   └── Configure-Network.ps1
├── Documentation\
│   ├── device-boot-procedures.pdf
│   └── troubleshooting-guide.pdf
└── README.txt
Pre-Configuration Checklist
# Configure laptop before field deployment:

1. [ ] Create local admin account (no domain dependency)
2. [ ] Install PuTTY for serial console access
3. [ ] Configure static IP profile: 192.168.88.2/24
4. [ ] Disable Windows Firewall or create rules
5. [ ] Disable Windows Defender real-time scanning for package folder
6. [ ] Test Netinstall with lab device before deployment
7. [ ] Sync all packages to latest required versions
8. [ ] Verify configuration scripts are current
9. [ ] Charge laptop fully
10. [ ] Test USB Ethernet adapter functionality
Documentation Standards
Runbook Template for Recovery Procedures
=====================================
MIKROTIK ROUTER RECOVERY RUNBOOK
=====================================

SCENARIO: Complete RouterOS reinstallation
ESTIMATED TIME: 15 minutes
PREREQUISITES: Netinstall kit, network access

PROCEDURE:
-----------------------------------------
Step 1: Prepare Workstation
- Connect laptop to isolated network port
- Disable Wi-Fi and VPN connections
- Set static IP: 192.168.88.2/24
- Launch Netinstall as Administrator

Step 2: Prepare MikroTik Device
- Disconnect power
- Connect Ethernet to port closest to power (usually ether1)
- Hold reset button
- Apply power while holding reset
- Release reset after 5 seconds (LED flashing)

Step 3: Perform Installation
- Verify device appears in Netinstall
- Select packages: routeros-[arch]-7.14.npk
- Uncheck "Keep old configuration"
- Click Install
- Wait for completion (2-3 minutes)

Step 4: Verify Installation
- Device reboots automatically
- Wait 60 seconds
- Scan in Winbox (Neighbors tab)
- Connect with admin / (no password)
- Verify version: /system resource print

Step 5: Apply Configuration
- Import configuration: /import file=site-config.rsc
- Verify connectivity
- Test critical services

ROLLBACK PROCEDURE:
- Repeat with previous RouterOS version
-----------------------------------------

TROUBLESHOOTING:
- Device not detected: Check firewall, cable, adapter
- Installation fails: Verify package architecture
- Boot loop: Try older RouterOS version
-----------------------------------------

CONTACTS:
- Network Team: noc@company.com
- Escalation: network-escalation@company.com
=====================================
Real-World Use Cases and Scenarios
Enterprise Data Center Recovery
Scenario
A CCR1036 core router in a data center becomes unresponsive after a failed firmware upgrade. The device handles traffic for 200 virtual servers.
Recovery Procedure
- Failover Activation: Confirm backup router handling traffic via VRRP
- Physical Access: Technician connects laptop directly to failed CCR1036
- Serial Console: Verify device is in recovery mode via serial connection
- Netinstall Execution: Install known-good RouterOS 7.13.5 (tested version)
- Configuration Restore: Import configuration from version control
- Verification: Test routing tables, BGP sessions, firewall rules
- Traffic Migration: Restore as primary VRRP member
Key Success Factors
- Pre-staged recovery kit at data center
- Configuration backup in version control (Git)
- Documented recovery procedure tested quarterly
- Redundant router configuration (VRRP) enabled
MSP Multi-Client Deployment
Scenario
An MSP must deploy 50 hAP ac² devices across 50 client sites within one week. Each site requires unique IP addressing and VPN configuration.
Deployment Workflow
# Step 1: Create site-specific configuration database
# sites.csv:
site_id,client_name,wan_type,wan_ip,lan_subnet,vpn_peer
001,Acme Corp,static,203.0.113.10/30,10.1.1.0/24,vpn.acme.com
002,Beta Inc,dhcp,,10.2.1.0/24,vpn.beta.com
...

# Step 2: Generate configurations
foreach ($site in Import-Csv sites.csv) {
    $template = Get-Content "template.rsc"
    $config = $template -replace "{{SITE_ID}}", $site.site_id
    $config = $config -replace "{{WAN_IP}}", $site.wan_ip
    $config = $config -replace "{{LAN_SUBNET}}", $site.lan_subnet
    $config | Out-File "configs/$($site.site_id)-config.rsc"
}

# Step 3: Batch Netinstall with site-specific configs
foreach ($site in Import-Csv sites.csv) {
    Write-Host "Ready for device: $($site.site_id)"
    Write-Host "Press Enter when device is in Netinstall mode..."
    Read-Host

    netinstall-cli.exe -r -a 192.168.88.3 -s "configs/$($site.site_id)-config.rsc" -p packages/

    # Label device with site ID
    Write-Host "LABEL DEVICE: $($site.site_id) - $($site.client_name)"
    Write-Host "Press Enter for next device..."
    Read-Host
}
Quality Control Process
- Generate configuration from template
- Validate configuration syntax
- Install RouterOS and configuration via Netinstall
- Run automated verification tests
- Apply physical label with site ID
- Package with site-specific documentation
- Ship to installation technician
Lab Environment Management
Scenario
A training lab contains 20 MikroTik devices that must be reset to default configuration before each training session.
Automated Lab Reset Script
# Lab-Reset.ps1
# Resets all lab devices to baseline configuration

$LabDevices = @(
    @{IP="192.168.88.101"; Name="LAB-R01"},
    @{IP="192.168.88.102"; Name="LAB-R02"},
    @{IP="192.168.88.103"; Name="LAB-SW01"},
    @{IP="192.168.88.104"; Name="LAB-AP01"}
    # ... additional devices
)

# Method 1: Reset via API (if devices are accessible)
foreach ($device in $LabDevices) {
    Write-Host "Resetting $($device.Name)..."

    # SSH command to reset configuration
    $sshCommand = "/system reset-configuration no-defaults=yes skip-backup=yes"

    # Execute via SSH (requires SSH key authentication)
    ssh admin@$($device.IP) $sshCommand

    Start-Sleep -Seconds 5
}

# Method 2: Use Netinstall for complete wipe
# Requires physical connection to each device
Write-Host "Devices will reboot. Use Netinstall for complete reinstallation if needed."
Lab Configuration Baseline
# lab-baseline.rsc
# Minimal configuration for training lab devices

/system identity set name="LAB-DEVICE"

# Admin access only from lab network
/user set [find name=admin] password="LabPassword123"

# Basic IP for management
/ip address add address=192.168.88.1/24 interface=ether1

# Reset all other configuration to allow student experimentation
/interface bridge remove [find]
/ip firewall filter remove [find]
/ip firewall nat remove [find]

# Enable all discovery protocols for lab visibility
/ip neighbor discovery-settings set discover-interface-list=all
/tool mac-server set allowed-interface-list=all
/tool mac-server mac-winbox set allowed-interface-list=all
Conclusion
Key Takeaways
- Netinstall is essential for MikroTik disaster recovery and mass deployment
- Preparation determines success — maintain package repositories and tested procedures
- Automation scales — scripts reduce deployment time from hours to minutes
- Documentation saves time — runbooks enable any team member to execute recovery
- Test procedures regularly — quarterly drills ensure readiness
Recommended Next Steps
- Download Netinstall and verify it works with a test device
- Create a portable recovery kit for your environment
- Document device-specific boot procedures for your hardware inventory
- Build configuration templates for common deployment scenarios
- Implement configuration version control (Git repository)
- Schedule quarterly recovery drills
Final Recommendation
Practice Netinstall procedures before you need them. A failed router at 2 AM is not the time to learn the process. Build your recovery kit, test your scripts, and document your procedures today.
Additional Resources
Official MikroTik Documentation
- MikroTik Netinstall Documentation
- RouterOS Download Page
- RouterBOOT Configuration Guide
- First Time Configuration Guide
Community Resources
Frequently Asked Questions
Can I use Netinstall on Linux?
Netinstall is a Windows application. On Linux, you can run it using Wine with additional network configuration. Native Linux support is not officially provided by MikroTik.
Does Netinstall erase the license?
No. RouterBOARD devices store licenses in protected memory. Netinstall does not affect the license. For x86 installations or CHR, you must re-apply the license key after reinstallation.
Can I downgrade RouterOS using Netinstall?
Yes. Netinstall can install any RouterOS version compatible with your hardware. Select the desired version packages before installation. Note that configurations from newer versions may not be compatible with older versions.
Why does Netinstall not detect my device?
Common causes include Windows Firewall blocking BOOTP traffic, multiple active network adapters, managed switches filtering broadcast traffic, or incorrect reset button timing. Connect directly to the device and disable firewall for troubleshooting.
Can I install multiple packages simultaneously?
Yes. Place all required packages in the same folder and select them in Netinstall. The main routeros package is required. Additional packages (wireless, gps, ups, etc.) are optional based on device capabilities and requirements.
How do I find the correct architecture for my device?
Check the MikroTik website product page for your device model. The architecture is listed in specifications. Alternatively, access RouterBOOT via serial console during boot to see hardware information.
Can I preserve configuration during Netinstall?
Yes. Enable “Keep old configuration” option in Netinstall settings. This preserves the existing configuration after RouterOS reinstallation. This option is useful when only the operating system is corrupted, not the configuration.
What is the difference between Netinstall and reset button recovery?
Reset button resets configuration to defaults but does not reinstall RouterOS. Netinstall completely reinstalls the operating system. Use Netinstall when RouterOS is corrupted or when changing versions. Use reset button for configuration problems only.
Check our list of MikroTik guides