Essential MikroTik Commands Every Network Engineer Should Know
Getting Started with MikroTik CLI
Accessing the CLI
You can access the MikroTik CLI through several methods:
- SSH: Securely log in remotely with:
ssh admin@<router-ip> - Telnet: Use in controlled environments:
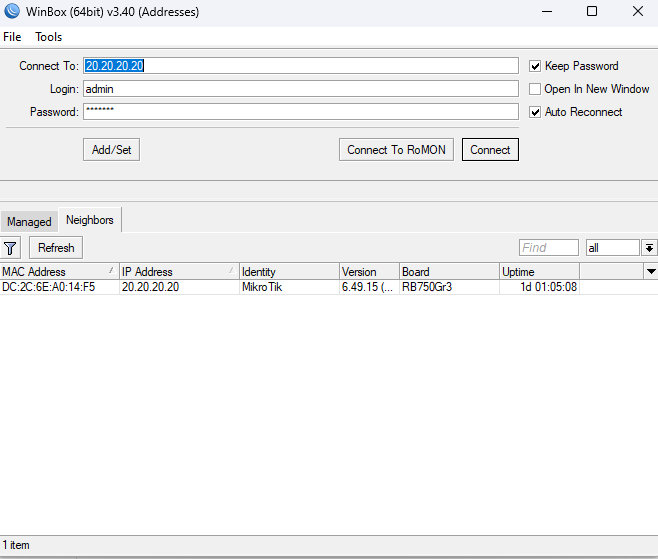
telnet <router-ip> - WinBox Terminal: Use the built-in terminal in WinBox.
- Console Port: Direct access via a serial cable for initial setups or recovery scenarios.
Command Syntax and Auto-Completion
MikroTik commands follow a consistent structure:
/path/to/command action [parameters]For example, to list all interfaces:
/interface printUse the Tab key for auto-completion and type ? to display available parameters. This helps speed up command entry and reduces errors.
Tips for First-Time Users
Essential Commands for Network Configuration
Interface Management
- List Interfaces:
/interface print - Enable/Disable an Interface: Enable with
/interface enable ether1and disable with/interface disable ether1 - Monitor Interface Status: Use
/interface ethernet monitor ether1to view real-time statistics.
IP Address Configuration
- Add an IP Address: Example:
/ip address add address=192.168.1.1/24 interface=ether1 - List IP Addresses:
/ip address print
Routing
- Add a Static Route:
/ip route add dst-address=192.168.2.0/24 gateway=192.168.1.1 - View the Routing Table:
/ip route print - Monitor a Specific Route:
/ip route monitor [id]
Firewall and Security Commands
Firewall Rules
- Add a Firewall Rule: Example:
/ip firewall filter add chain=input action=accept protocol=tcp dst-port=22 - List Firewall Rules:
/ip firewall filter print
NAT Configuration
- Configure NAT: Enable NAT for outbound traffic with
/ip firewall nat add chain=srcnat action=masquerade - View NAT Rules:
/ip firewall nat print
Port Security
Isolate ports to enhance security. For example:
/interface bridge port set ether3 horizon=1
Monitoring and Troubleshooting Commands
System Monitoring
- Check CPU and Memory Usage:
/system resource print - Monitor Real-Time Traffic:
/interface monitor-traffic ether1
Logs and Diagnostics
- View System Logs:
/log print - Ping Test:
/tool ping 8.8.8.8 - Traceroute:
/tool traceroute google.com
Packet Sniffing
- Quick Packet Capture:
/tool sniffer quick - Advanced Capture Options: Adjust filters and export settings as needed for in-depth analysis.
Advanced Configuration and Automation Commands
DHCP Server/Client Setup
- Configure a DHCP Server:
/ip dhcp-server setup - Check DHCP Client Status:
/ip dhcp-client print
VPN Configuration
- Set Up a PPTP VPN Client:
/interface pptp-client add connect-to=VPN_Server_IP user=username password=password - Set Up an L2TP VPN Client:
/interface l2tp-client add connect-to=VPN_Server_IP user=username password=password
QoS and Traffic Shaping
- Configure a Simple Queue:
/queue simple add name="User1" target=192.168.1.100 max-limit=10M/10M
Scripting and Automation
MikroTik’s scripting capabilities allow you to automate routine tasks:
- Backup Script Example:
/system backup save name=auto_backup_$(/system clock get date) - Schedule a Task:
/system scheduler add name="DailyBackup" interval=24h on-event="/system backup save name=backup_$(/system clock get date)" - Simple Monitoring Script: Example:
:if ([/system resource get cpu-load] > 80) do={
  /log warning "High CPU load detected!"
}
Backup and Maintenance Commands
Backup and Restore
- Create a Backup:
/system backup save name=backup_YYYYMMDD - Restore a Backup:
/system backup load name=backup_YYYYMMDD
Firmware Updates
- Check for Updates:
/system package update check-for-updates - Install Updates:
/system package update install
Scheduling Maintenance Tasks
- Schedule Regular Backups:
/system scheduler add name="WeeklyBackup" interval=7d on-event="/system backup save name=weekly_backup_$(/system clock get date)" - Automate Update Checks:
/system scheduler add name="UpdateCheck" interval=24h on-event="/system package update check-for-updates"
Tips for Mastering the MikroTik CLI
- Practice Regularly: Use a lab environment to experiment without risk.
- Keep a Cheat Sheet: Document frequently used commands and best practices.
- Leverage Auto-Completion: Utilize the Tab key and the built-in
?help command. - Export and Review Configurations: Regularly run
/exportto review your settings. - Write and Test Scripts: Automate tasks with small scripts and schedule them for consistency.
- Monitor System Logs: Use
/log printto catch issues early. - Engage with the Community: Join the MikroTik Forum and r/mikrotik on Reddit for tips and support.
Conclusion
Mastering the MikroTik CLI is a critical step for any network engineer aiming to harness the full power of RouterOS. By learning these essential commands—from interface management to advanced scripting—you will improve your network’s performance, security, and overall efficiency.
Remember these key takeaways:
- Begin with the fundamentals: navigation, command syntax, and auto-completion.
- Configure your network properly with effective interface, IP, and routing commands.
- Secure your network using robust firewall, NAT, and port security configurations.
- Utilize monitoring and diagnostic commands to troubleshoot issues quickly.
- Leverage advanced features like VPN, QoS, and scripting to automate tasks.
- Maintain regular backups and firmware updates to ensure long-term stability.
- Practice consistently and engage with the community for continuous learning.
What’s your favorite MikroTik CLI command? Share your experiences and tips in the comments below. Check our list of MikroTik guides. Happy networking!


