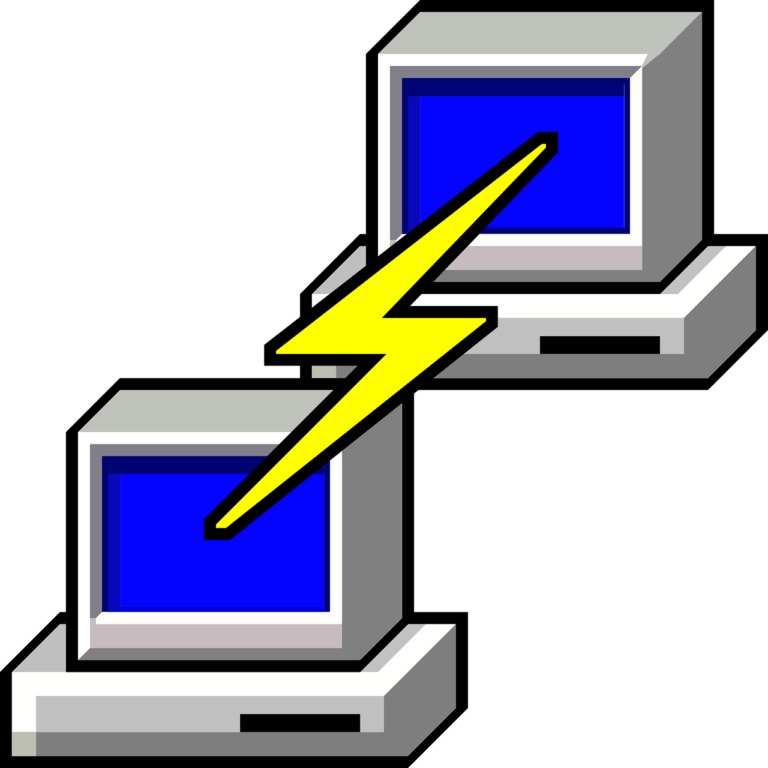
MikroTik Network Emulation with GNS3: A Comprehensive Guide
Emulating networks in a virtual environment has become an essential tool for network engineers and system administrators. Whether you’re testing new configurations, simulating network failures, or learning advanced routing techniques, network emulation offers a risk-free and cost-effective solution. This article provides a step-by-step guide on MikroTik network emulation with GNS3, highlighting practical configuration examples and best practices.
Table of Contents
What is Network Emulation?
Network emulation is the process of mimicking a real network environment in a virtualized platform. It enables you to:
- Test and validate configurations without impacting live networks
- Simulate complex network topologies and protocols
- Train staff in a risk-free environment
- Experiment with new technologies and deployment strategies
Why Emulate MikroTik Networks?
MikroTik routers, powered by RouterOS, are widely used for their versatility and cost-effectiveness. Emulating these networks can:
- Allow for the safe testing of routing protocols and firewall rules
- Enable performance evaluation under simulated loads
- Provide a practical environment for learning RouterOS and advanced network features
Overview of GNS3 and MikroTik
What is GNS3?
GNS3 (Graphical Network Simulator-3) is a powerful network emulation tool that allows you to design, test, and troubleshoot network configurations using a graphical interface. It supports real-time simulation and integrates with various network devices and virtual machines.
Key features of GNS3 include:
- Graphical topology design
- Integration with multiple virtualization platforms (VMware, VirtualBox, etc.)
- Supports a wide range of network device images
- Real-time configuration and monitoring
Introducing MikroTik RouterOS and CHR
MikroTik’s RouterOS is the operating system that powers its routers. In addition to physical hardware, MikroTik offers a Cloud Hosted Router (CHR) image, which is specifically designed for virtualized environments. CHR enables you to deploy MikroTik RouterOS on platforms like GNS3, allowing you to test configurations and simulate network scenarios without investing in physical hardware.
Benefits of using MikroTik CHR:
- Cost-effective network emulation
- Flexibility to experiment with different configurations
- Ideal for learning and development environments
Setting Up GNS3 for MikroTik Emulation
System Requirements
Before diving into configuration, ensure your system meets the following prerequisites:
- Hardware: At least 8GB of RAM, multi-core CPU, and SSD storage for faster performance.
- Operating System: Windows, macOS, or Linux (GNS3 is cross-platform).
- Virtualization Software: VMware Workstation, VirtualBox, or the GNS3 VM for optimal virtualization performance.
Installing GNS3
Follow these steps to install GNS3:
- Download the latest version of GNS3 from the official GNS3 website.
- Run the installer and follow the on-screen instructions.
- During installation, select the components you wish to install (GNS3 GUI, server, and appliance templates).
- Once installed, launch GNS3 and complete the initial configuration wizard.
Integrating GNS3 with Virtualization Platforms
For an optimized setup, integrate GNS3 with your preferred virtualization platform:
- VMware Workstation: Install the VMware Workstation software and the GNS3 VM. Import the GNS3 VM in VMware and configure network adapters for bridged or host-only networking.
- VirtualBox: Install VirtualBox, then set up a new VM for GNS3. Adjust network settings as required.
- GNS3 VM: Download the GNS3 VM appliance from the GNS3 website and import it into your virtualization software. This VM provides a streamlined environment for running complex network simulations.
Adding MikroTik CHR to GNS3
Downloading the MikroTik CHR Image
The MikroTik CHR image is available from the official MikroTik website. Follow these steps to obtain it:
- Visit the MikroTik Download Page.
- Scroll down to the CHR section and download the latest .img file for your virtualization platform.
- Ensure that you have a valid MikroTik account if required for access.
Importing the CHR Image into GNS3
Once you have the CHR image, follow these steps to import it into GNS3:
- Open GNS3 and navigate to Edit > Preferences.
- Click on QEMU VMs and then on Add a new QEMU VM.
- Configure the VM settings:
- Name: MikroTik CHR
- RAM: 512MB to 1GB (depending on your test requirements)
- CPU: 1 core (increase if necessary for heavier simulations)
- HDD: Use the downloaded CHR image (.img file)
- After configuring the settings, click Finish to add the CHR appliance.
Initial Configuration of MikroTik CHR
With the CHR image imported, you can now perform the initial setup:
- Start the MikroTik CHR node in your GNS3 topology.
- Connect to the device via the GNS3 console or Winbox.
- Perform basic configuration:
# Set a hostname for easier identification /system identity set name="GNS3-CHR" # Assign an IP address to the first interface (ether1) ip address add address=192.168.1.1/24 interface=ether1 # Enable essential services (e.g., Winbox, SSH) ip service enable winbox ip service enable ssh - Save the configuration:
/system reboot
Building and Testing Network Topologies
Once your MikroTik CHR is up and running in GNS3, you can start designing and testing various network scenarios. Below are some common steps and tips for building topologies:
Designing Network Topologies with MikroTik Routers
- Simple Topology:
- Create a basic topology connecting two MikroTik routers with a single link.
- Test basic routing and firewall rules between the devices.
- Complex Topology:
- Design a multi-router network with redundant links.
- Integrate additional devices like Linux hosts or virtual switches.
- Simulate WAN/LAN segmentation and inter-VLAN routing.
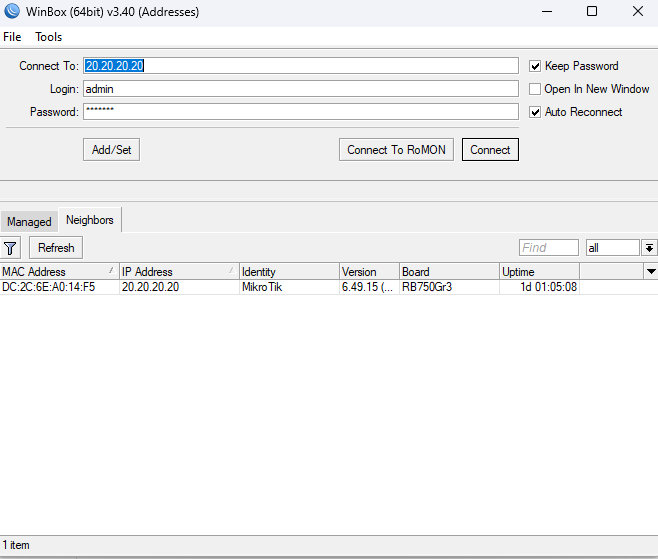
Connecting to MikroTik Routers via Winbox
Winbox remains one of the most user-friendly ways to manage MikroTik devices. To connect:
- Download Winbox from the official MikroTik website.
- Open Winbox and scan for available MikroTik devices in your GNS3 topology.
- Select the desired device and log in using the default credentials (usually
adminwith no password). - Once connected, you can graphically manage interfaces, routing protocols, and firewall rules.
Simulating Network Scenarios
Use your emulated network to simulate real-world scenarios:
- Routing Protocols: Experiment with OSPF, BGP, or RIP configurations across your MikroTik routers.
- Firewall Testing: Set up firewall rules to restrict traffic and then test using simulated attacks or legitimate traffic flows.
- Service Deployments: Configure VPN, NAT, and DHCP services on MikroTik CHR and observe how they perform under load.
Example: Configuring OSPF on MikroTik CHR
# Enable OSPF on the router
/routing ospf instance set [ find default=yes ] router-id=192.168.1.1

# Add a network to the OSPF area
/routing ospf network add network=192.168.1.0/24 area=backbone
Advanced Features and Best Practices
Leveraging MikroTik Tools in GNS3
MikroTik RouterOS comes with a host of advanced tools that you can use to enhance your network emulation:
- RoMON (Router Management Overlay Network):
- Use RoMON for centralized network monitoring.
- Configure RoMON to monitor traffic and device health across your topology.
- Script Automation:
- Automate repetitive tasks using MikroTik scripting language.
- Schedule configuration backups and log file exports.
- Advanced Routing:
- Deploy policy-based routing, load balancing, and failover mechanisms.
- Test different routing strategies under various simulated network conditions.
Optimizing Performance in GNS3
To ensure your network emulation runs smoothly, consider the following tips:
- Resource Allocation: Allocate sufficient RAM and CPU cores to each virtual device.
- Disk Performance: Use SSDs for faster disk I/O, especially when running multiple virtual machines.
- Network Adapters: Configure virtual network adapters correctly (bridged, NAT, or host-only) to simulate realistic environments.
- Snapshots and Backups: Regularly save snapshots of your topology to quickly revert to a known state if configurations fail.
Troubleshooting Common Issues
Even the best-configured emulation environments may encounter issues. Here are the common troubleshooting steps:
- Connectivity Problems:
- Verify interface IP assignments and subnet masks.
- Use ping and traceroute commands from within MikroTik CLI to isolate connectivity issues.
- Resource Bottlenecks:
- Monitor CPU and memory usage on the host system.
- Adjust resource allocations as necessary.
- Configuration Errors:
- Review configuration logs in MikroTik for error messages.
- Use Winbox’s built-in tools to examine routing tables and firewall rules.
Example: Verifying Interface Configuration via CLI
# Check the IP configuration on all interfaces
/ip address print

# Display the routing table for OSPF routes
/routing ospf route print
Conclusion
Emulating MikroTik networks using GNS3 offers a robust, scalable, and cost-effective way for network engineers and system administrators to test configurations, validate designs, and expand their technical expertise without risking production environments.
In this guide, we covered:
- The basics and benefits of network emulation
- An overview of GNS3 and MikroTik CHR
- Step-by-step setup instructions and real configuration examples
- Designing and testing various network topologies
- Advanced features and troubleshooting techniques
With the knowledge gained from this guide, you’re now ready to deploy and experiment with your own MikroTik network simulations. Continuous practice and exploration in a virtualized environment will prepare you for the challenges of modern network design and management.
Additional Resources
To further enhance your understanding and skills, here are some additional resources:
-
- Official Documentation:
- Tutorials and Forums:
- Video Tutorials:
- Books and eBooks:
- Look for titles focusing on network simulation, RouterOS, and GNS3 for in-depth technical knowledge.
These resources will support your continued learning and help you stay updated with the latest advancements in network emulation and virtualization.
Final Thoughts
The integration of MikroTik CHR with GNS3 not only enhances your testing capabilities but also empowers you to innovate and design networks that can handle today’s dynamic IT challenges. Whether you’re an enterprise network engineer or a systems administrator, mastering these tools is an investment in your career and your organization’s network resilience.
Happy emulating, and may your network simulations lead to greater real-world success!