PPPoE Server on MikroTik for ISP Deployments
Point-to-Point Protocol over Ethernet (PPPoE) continues to serve as a fundamental protocol in Internet Service Provider (ISP) networks worldwide. Despite the emergence of newer technologies, PPPoE offers distinct advantages for user management, authentication, and accounting that maintain its position as a preferred choice for many ISPs.
MikroTik RouterOS provides a powerful and cost-effective platform for implementing PPPoE services. It allows ISPs of all sizes to deploy reliable broadband services without significant capital investment. The platform combines the versatility needed for sophisticated network deployments with straightforward configuration options.
This guide presents a technical walkthrough for network engineers and system administrators responsible for implementing and managing PPPoE server on MikroTik devices. Recent data shows that over 60% of small to medium ISPs still utilize PPPoE for subscriber management, highlighting its continued relevance in the industry.
By the end of this article, you will understand:
- The fundamentals of PPPoE server implementation on MikroTik platforms
- How to select appropriate hardware for your subscriber base
- Basic and advanced configuration techniques
- Methods to scale, secure, and maintain your PPPoE infrastructure
Table of Contents
- Understanding PPPoE in ISP Environments
- Hardware Considerations for MikroTik PPPoE Servers
- Basic PPPoE Server Configuration
- Advanced Configuration for ISP-Grade Deployments
- Scaling Your PPPoE Infrastructure
- Security Best Practices
- Monitoring and Troubleshooting
- Integration with Other ISP Systems
- Real-World Deployment Case Study
- Future-Proofing Your PPPoE Deployment
- Conclusion
- Resources
Understanding PPPoE in ISP Environments
What is PPPoE and Why ISPs Use It
PPPoE combines Ethernet’s simplicity with PPP’s authentication, encryption, and compression features. The protocol creates a virtual point-to-point connection over the Ethernet network, enabling:
- User authentication before granting internet access
- Session tracking for billing and management
- Bandwidth control and quality of service implementation
- IP address assignment and management
PPPoE works through a discovery phase (PADI, PADO, PADR, PADS) followed by a session phase where actual data transmission occurs.
Advantages of PPPoE for ISPs
- Authentication and Authorization: PPPoE requires users to authenticate before accessing the network, providing security and accountability.
- Session Management: Each connection creates a trackable session, facilitating billing and troubleshooting.
- Resource Control: ISPs can allocate bandwidth and IP addresses based on subscription plans.
- Compatibility: Works with various access technologies, including DSL, FTTH, and fixed wireless.
Common Challenges in PPPoE Deployments
- Overhead: PPPoE adds approximately 8 bytes to each packet, reducing effective MTU size.
- Scalability Concerns: Large deployments require careful planning for hardware resources.
- Session Stability: Maintaining session stability requires proper configuration and monitoring.
- Authentication System Integration: RADIUS or local authentication must work consistently.
MikroTik’s PPPoE Implementation
MikroTik RouterOS implements all standard PPPoE features with some notable advantages:
- Performance: Excellent session-per-dollar ratio compared to enterprise solutions
- Integration: Built-in firewall, QoS, and routing capabilities
- Flexibility: Supports multiple authentication methods
- Management: Comprehensive tools for monitoring and troubleshooting
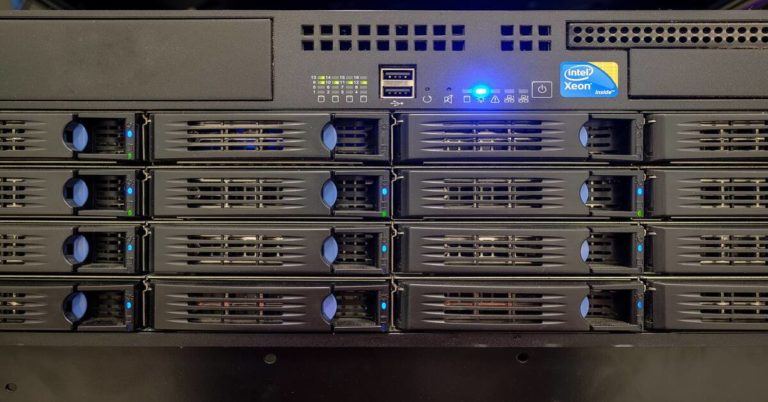
Hardware Considerations for MikroTik PPPoE Servers
Recommended MikroTik Devices by Deployment Size
| Deployment Size | Concurrent Users | Recommended Hardware | Approximate Cost |
|---|---|---|---|
| Small ISP | Up to 500 | CCR1009-7G-1C | $495 |
| Medium ISP | 500-2000 | CCR1036-8G-2S+ | $995 |
| Large ISP | 2000-5000 | CCR1072-1G-8S+ | $3,000 |
| Enterprise | 5000+ | Multiple CCR1072 | $3,000+ each |
Hardware Requirements Analysis
When selecting hardware, consider these factors:
- CPU Performance: Each active PPPoE session requires CPU resources for authentication, packet processing, and accounting.
- RAM Requirements: Rule of thumb: 32MB base + (0.5-1MB × maximum concurrent sessions)
- Network Interface Capacity: Consider total throughput requirements and uplink needs
- RouterOS License Level: Ensure your license supports the number of planned users
Performance Benchmarks
Tests conducted on MikroTik hardware with RouterOS 7.x show:
- CCR1009-7G-1C: Handles ~800 PPPoE sessions with QoS at 60% CPU utilization
- CCR1036-8G-2S+: Manages ~3,000 PPPoE sessions with QoS at 70% CPU utilization
- CCR1072-1G-8S+: Supports ~7,000 PPPoE sessions with QoS at 65% CPU utilization
Remember that enabling additional features like extensive firewall rules, traffic accounting, or proxies will decrease these numbers.
Basic PPPoE Server Configuration
Setting Up PPPoE Server in RouterOS
Here’s a step-by-step configuration example for a basic PPPoE server:
- Create a PPPoE Server Interface:
/interface pppoe-server server
add authentication=mschap2 disabled=no interface=ether1-gateway \
    keepalive-timeout=10 max-mru=1480 max-mtu=1480 \
    max-sessions=500 mrru=disabled one-session-per-host=yes \
    service-name=ISP
- Create IP Pool for PPPoE Clients:
/ip pool
add name=pppoe-pool ranges=10.10.10.2-10.10.10.254
- Configure PPP Profile:
/ppp profile
add change-tcp-mss=yes dns-server=8.8.8.8,8.8.4.4 local-address=10.10.10.1 \
    name=pppoe-profile remote-address=pppoe-pool use-encryption=yes
- Set Up Local Authentication:
/ppp secret
add name=user1 password=password1 profile=pppoe-profile service=pppoe
add name=user2 password=password2 profile=pppoe-profile service=pppoe
Essential Configuration Parameters Explained
- Authentication: Options include mschap2 (most secure), mschap1, chap, and pap (least secure).
- Interface: The Ethernet interface where the PPPoE server listens for client connections.
- Max-MRU/MTU: Set slightly lower than standard 1500 to accommodate PPPoE overhead.
- One-session-per-host: Prevents multiple sessions from the same MAC address.
- Service-name: Identifier for your PPPoE service.
Creating PPPoE Profiles
Profiles allow you to apply specific settings to groups of users:
- Basic Profile Settings:
- Local and remote address configuration
- DNS server assignment
- Rate limits
- Advanced Profile Options:
- Change-tcp-mss: Adjusts TCP MSS to prevent fragmentation
- Use-compression: Enables protocol compression
- Use-encryption: Enables data encryption
- Only-one: Limits users to a single concurrent session
Authentication Methods
- Local Authentication:
- Simple setup using /ppp secrets
- Suitable for small deployments
- Limited scalability
- RADIUS Authentication:
- Basic RADIUS configuration:
/radius
add address=10.0.0.5 secret=radiusSecretKey service=ppp
/ppp aaa
set use-radius=yes
Advanced Configuration for ISP-Grade Deployments
Implementing RADIUS Authentication and Accounting
For production ISP environments, RADIUS provides scalable authentication, authorization, and accounting:
- Complete RADIUS Configuration:
/radius
add address=10.0.0.5 secret=radiusSecretKey service=ppp
add address=10.0.0.6 secret=radiusSecretKey service=ppp

/radius incoming
set accept=yes

/ppp aaa
set accounting=yes interim-update=5m use-radius=yes

/interface pppoe-server server
set authentication=mschap2,chap default-profile=pppoe-profile
- RADIUS Attributes:
- Mikrotik-Rate-Limit: Controls bandwidth (e.g., “10M/10M”)
- Framed-IP-Address: Assigns specific IP to user
- Acct-Interim-Interval: Sets accounting update frequency
IP Pool Management Strategies
Effective IP management is crucial for scalable ISP operations:
- Hierarchical Pools:
/ip pool
add name=residential-pool ranges=10.64.0.0/16
add name=business-pool ranges=10.72.0.0/16
add name=vip-pool ranges=10.80.0.0/16

/ppp profile
add name=residential-profile remote-address=residential-pool
add name=business-profile remote-address=business-pool
add name=vip-profile remote-address=vip-pool
- DHCP vs. Static Assignment:
- Use RADIUS Framed-IP-Address for static IPs
- Use pools for dynamic allocation
VLAN Implementation with PPPoE
VLANs segregate traffic for different service types or customer groups:
- Creating VLAN Interfaces:
/interface vlan
add interface=ether1 name=vlan-residential vlan-id=100
add interface=ether1 name=vlan-business vlan-id=200

/interface pppoe-server server
add interface=vlan-residential service-name=Residential
add interface=vlan-business service-name=Business
- VLAN-specific Profiles:
- Create separate profiles for each VLAN
- Apply appropriate QoS and firewall rules
MTU Optimization Techniques
Proper MTU settings prevent fragmentation issues:
- PPPoE MTU Calculation:
- Standard Ethernet MTU: 1500 bytes
- PPPoE overhead: 8 bytes
- Recommended PPPoE MTU: 1492 bytes
- Implementation Example:
/interface pppoe-server server
set max-mru=1492 max-mtu=1492

/ppp profile
set [find] change-tcp-mss=yes
Queue Types and Bandwidth Management
MikroTik offers several queue types for traffic management:
- PCQ (Per Connection Queue):
/queue type
add kind=pcq name=pcq-upload pcq-classifier=src-address \
    pcq-rate=10M
add kind=pcq name=pcq-download pcq-classifier=dst-address \
    pcq-rate=10M

/queue simple
add name=customer-queue target=pppoe-customers \
    upload-max-limit=10M download-max-limit=10M
- Simple Queues vs. Queue Trees:
- Simple queues offer straightforward configuration
- Queue trees provide more flexibility for complex setups
Scaling Your PPPoE Infrastructure
Designing for High Availability
Redundancy is essential for ISP-grade service reliability:
- Dual Router Configuration:
/interface bridge
add name=ha-bridge

/interface ethernet
set [find name=ether2] master-port=ha-bridge

/ip address
add address=10.255.255.1/30 interface=ha-bridge

# On backup router
/ip address
add address=10.255.255.2/30 interface=ha-bridge
- Failover Scripts:
- Use RouterOS scripts to monitor primary router
- Configure automatic failover mechanisms
Load Balancing Considerations
For large deployments, distribute the load across multiple devices:
- Geographic Distribution:
- Deploy multiple PPPoE servers in different areas
- Use OSPF or BGP for routing between locations
- Service-based Segregation:
- Dedicate specific hardware to different service tiers
- Configure separate servers for residential and business clients
Hierarchical Deployment Models
Scalable PPPoE deployments often use layered architectures:
- Access Layer PPPoE Concentrators:
- Handle authentication and initial connection
- Limited firewall and QoS functions
- Distribution Layer Routing:
- Manages inter-VLAN routing
- Implements advanced QoS and traffic policies
- Core Layer:
- Connects to upstream providers
- Handles transit traffic
Performance Optimization Techniques
Fine-tune your RouterOS configuration for maximum efficiency:
- Fastpath Optimization:
/ip settings
set tcp-syncookies=no

/ip firewall connection tracking
set enabled=yes tcp-established-timeout=1h udp-timeout=10s
- Queue Optimization:
- Use PCQ for fair bandwidth distribution
- Apply hierarchical token bucket when needed
- Hardware Considerations:
- Ensure CCR devices use all CPU cores:
/system resource cpu
print
Security Best Practices
Securing the PPPoE Server
Implement these security measures to protect your PPPoE infrastructure:
- Access Control Lists:
/ip firewall filter
add chain=input action=accept protocol=udp dst-port=1701,500,4500 \
    comment="Allow L2TP/IPsec"
add chain=input action=accept protocol=ipsec-esp comment="Allow IPsec"
add chain=input action=drop connection-state=new connection-nat-state=!dstnat \
    in-interface=pppoe-in comment="Drop new connections from PPPoE clients"
- Rate Limiting PPPoE Discovery Packets:
/interface pppoe-server server
set max-sessions=500 max-sessions-per-host=1 one-session-per-host=yes
Mitigating DoS Vulnerabilities
Protect against denial of service attacks:
- Connection Rate Limiting:
/ip firewall filter
add chain=input action=accept protocol=tcp dst-port=8291 \
    src-address-list=admin connection-limit=3,32 comment="Winbox rate limit"
add chain=input action=drop protocol=tcp dst-port=8291 comment="Drop excess Winbox"
- PPPoE Session Flood Protection:
/ip firewall filter
add chain=forward action=add-src-to-address-list protocol=tcp connection-limit=100,32 \
    address-list=flooding address-list-timeout=1h
add chain=forward action=drop src-address-list=flooding
Encryption Considerations
Secure data transmission within your PPPoE network:
- Require Strong Authentication:
/interface pppoe-server server
set authentication=mschap2 require-mschap2=yes
- RADIUS Server Security:
- Use TLS for RADIUS communications
- Implement RADIUS server redundancy
Monitoring and Troubleshooting
Essential Monitoring Metrics
Track these key performance indicators:
- Active Sessions Count:
/interface pppoe-server print stats
- CPU and Memory Usage:
/system resource print
- Interface Traffic:
/interface monitor-traffic ether1
Implementing Logging and Alert Systems
Configure comprehensive logging for troubleshooting:
- Basic Log Configuration:
/system logging
add topics=pppoe,info
add topics=error
add topics=critical
- Remote Syslog Setup:
/system logging action
add name=remote target=remote remote=10.0.0.5
/system logging
add action=remote topics=pppoe,info,debug
Common PPPoE Issues and Solutions
Troubleshoot these frequent PPPoE problems:
- Authentication Failures:
- Check RADIUS server connectivity
- Verify user credentials in /ppp secret
- Examine logs for authentication errors
- MTU-Related Issues:
- Confirm correct MTU/MRU settings
- Enable change-tcp-mss in profiles
- Test with ping using specific packet sizes
- Session Stability Problems:
- Adjust keepalive timeout settings
- Check for upstream network issues
- Examine physical connectivity
Using MikroTik Tools for Diagnostics
RouterOS provides several diagnostic tools:
- Connection Tracking:
/ip firewall connection print where dst-address=10.10.10.5
- Traffic Flow Analysis:
/tool torch interface=ether1 src-address=10.10.10.5
- Packet Capture:
/tool sniffer
set filter-interface=ether1 filter-ip-address=10.10.10.5/32
start
Integration with Other ISP Systems
Billing System Integration
Connect MikroTik to your billing platform:
- RADIUS Integration:
- Use accounting packets for usage tracking
- Configure interim updates for regular data collection
- API-Based Integration:
/system script
add name=update-billing source={
    /interface pppoe-server print stats
    # Process data and send to billing API
}
/system scheduler
add interval=5m name=billing-update on-event=update-billing
Automation Using MikroTik API
Streamline operations with API-based automation:
- User Management Script:
import routeros_api

connection = routeros_api.RouterOsApiPool('10.0.0.1', 'admin', 'password')
api = connection.get_api()

# Add new PPPoE user
api.get_resource('/ppp/secret').add(
    name='newuser',
    password='newpass',
    service='pppoe',
    profile='default-profile'
)
- Monitoring Integration:
- Use API to collect performance data
- Create custom dashboards with collected metrics
Real-World Deployment Case Study
Medium-Sized ISP Deployment Scenario
Let’s examine a real-world implementation for a regional ISP with 1,500 subscribers:
- Hardware Configuration:
- Primary: CCR1036-8G-2S+
- Backup: CCR1036-8G-2S+
- Switch: CRS326-24S+2Q+
- Network Architecture:
- Core routers in HA configuration
- Distribution switches with VLAN segregation
- Multiple access switches in field cabinets
Configuration Samples
Key configuration elements from this deployment:
- PPPoE Server with Multiple Profiles:
/interface pppoe-server server
add authentication=mschap2 default-profile=residential-profile \
    interface=vlan-access max-mru=1492 max-mtu=1492 \
    max-sessions=2000 service-name=RegionalISP

/ppp profile
add change-tcp-mss=yes dns-server=10.0.0.53,8.8.8.8 local-address=10.64.0.1 \
    name=residential-profile rate-limit=20M/10M remote-address=residential-pool
add change-tcp-mss=yes dns-server=10.0.0.53,8.8.8.8 local-address=10.72.0.1 \
    name=business-profile rate-limit=100M/50M remote-address=business-pool
- Firewall Configuration:
/ip firewall filter
add chain=forward action=fasttrack-connection connection-state=established,related
add chain=forward action=accept connection-state=established,related
add chain=forward action=drop connection-state=invalid
add chain=input action=accept connection-state=established,related
add chain=input action=drop connection-state=invalid
add chain=input action=accept protocol=icmp
add chain=input action=drop in-interface=pppoe-in connection-state=new
Lessons Learned
Important insights from this deployment:
- Hardware Sizing:
- Initial underestimation required mid-deployment upgrade
- Peak usage periods revealed bottlenecks
- Authentication Challenges:
- RADIUS server redundancy proved essential
- Local authentication fallback saved downtime
- MTU Optimization:
- Proper MTU settings eliminated customer complaints
- TCP MSS adjustment was critical for stability
Performance Results
Actual performance metrics:
- Session Capacity:
- Peak concurrent sessions: 1,350
- CPU utilization at peak: 58%
- RAM utilization: 1.2 GB
- Throughput:
- Aggregate peak throughput: 3.7 Gbps
- Average per-user throughput: 2.8 Mbps
- 99th percentile latency: 15ms
Future-Proofing Your PPPoE Deployment
Migration Paths to IPv6
Prepare your PPPoE infrastructure for IPv6:
- Dual-Stack Implementation:
/ipv6 pool
add name=ipv6-pool prefix=2001:db8::/64 prefix-length=80

/ppp profile
set [find name=residential-profile] ipv6-pool=ipv6-pool \
    ipv6-dns=2001:4860:4860::8888 ipv6-prefix-pool=ipv6-pool \
    ipv6-prefix-length=64
- Native IPv6 PPPoE:
- Configure IPv6 addresses on interfaces
- Update firewall rules for IPv6 traffic
- Ensure RADIUS supports IPv6 attributes
Considerations for GPON/FTTH Integrations
Adapt your PPPoE deployment for fiber networks:
- OLT Integration:
- Configure VLANs per ONU/ONT
- Set Q-in-Q tagging if required
- GPON-specific PPPoE Challenges:
- Higher bandwidth requirements
- More concurrent sessions
- Lower latency expectations
Emerging Alternatives to PPPoE
Stay informed about future technologies:
- IPoE with DHCP Option 82:
- Simpler protocol overhead
- Potential replacement for PPPoE
- Less authentication options
- TR-069/CWMP Management:
- Enhanced CPE management
- Works alongside PPPoE
- Enables remote device configuration
Conclusion
MikroTik RouterOS offers a capable and cost-effective platform for implementing PPPoE services in ISP networks of all sizes. The key considerations for a successful deployment include:
- Proper hardware sizing based on concurrent users and throughput requirements
- Careful configuration of authentication systems
- Implementation of security best practices
- Comprehensive monitoring and troubleshooting tools
- Integration with existing operational systems
By following the guidelines and examples in this article, network engineers can implement PPPoE services that balance performance, reliability, and cost-effectiveness. The scalability options provided by MikroTik allow for growth without requiring complete infrastructure replacement.
As ISP networks continue to evolve, PPPoE on MikroTik remains a viable solution that adapts to new requirements like IPv6 and increasing bandwidth demands. With proper planning and implementation, your PPPoE infrastructure can provide years of reliable service.
Resources
Configuration Templates
- Basic PPPoE Server:
/interface pppoe-server server add authentication=mschap2 disabled=no interface=ether1 \ keepalive-timeout=10 max-mru=1492 max-mtu=1492 \ service-name=ISP - RADIUS Authentication:
/radius
add address=10.0.0.5 secret=radiusSecret service=ppp
/ppp aaa
set use-radius=yes accounting=yes interim-update=5m
Useful MikroTik Scripts for PPPoE Management
- Monitor Active Sessions:
:local activeSessions [/interface pppoe-server print count-only]; :log info "Active PPPoE sessions: $activeSessions"; - Alert on High CPU Load:
:local cpuLoad [/system resource get cpu-load];
:if ($cpuLoad > 80) do={
 :log warning "High CPU load: $cpuLoad%";
 # Send email or other notification
}
Further Reading and Community Resources
- MikroTik Official Documentation: https://wiki.mikrotik.com/wiki/Manual:Interface/PPPoE
- MikroTik Forums: https://forum.mikrotik.com/
- The MikroTik App: Available on iOS and Android for monitoring RouterOS devices
PPPoE Server Performance Tuning Cheatsheet
- CPU Optimization:
- Enable fasttrack when possible
- Minimize firewall rule complexity
- Use hardware offloading where available
- Memory Management:
- Increase DNS cache if many users
- Monitor connection tracking table size
- Adjust queue buffer sizes for performance
- Network Optimization:
- Use appropriate MTU/MRU values
- Enable TCP MSS clamping
- Configure proper queue types for traffic management