Simple Network Management Protocol (SNMP) Configuration on MikroTik
SNMP stands for Simple Network Management Protocol. It lets you gather data from network devices and is used by network engineers and systems administrators. This article explains SNMP configuration on MikroTik devices. You will learn how to set up basic SNMP settings, secure the configuration using SNMP v3, test your configuration, and follow best practices in an enterprise setting.
MikroTik RouterOS supports SNMP versions 1, 2c, and 3. SNMP v1 and v2c use community strings for access, while SNMP v3 adds user authentication and encryption. The guide below provides clear, actionable steps with real configuration examples.
2. Understanding SNMP on MikroTik
What is SNMP?
SNMP is a protocol that allows you to monitor network devices. It uses operations like GET, SET, and TRAP:
- GET: Retrieves data from a device.
- SET: Changes a device setting.
- TRAP: Sends an alert when an event occurs.
SNMP Versions
- SNMP v1: Uses a community string for basic monitoring.
- SNMP v2c: Similar to v1 but gathers more data; security still relies on plain text community strings.
- SNMP v3: Adds user authentication and encryption for better security.
Benefits of SNMP Monitoring
- View real-time network statistics.
- Detect faults early.
- Automate alerts when issues arise.
- Integrate data with popular monitoring tools.
MIBs and OIDs
MIB (Management Information Base): A file that stores definitions for the data available from a device.
OID (Object Identifier): A unique number that represents a specific variable on a device. For example, an OID may represent the number of bytes passing through a network port.
3. Basic SNMP Configuration on MikroTik RouterOS
Enabling the SNMP Service
Before using SNMP, enable the SNMP service on your MikroTik device.
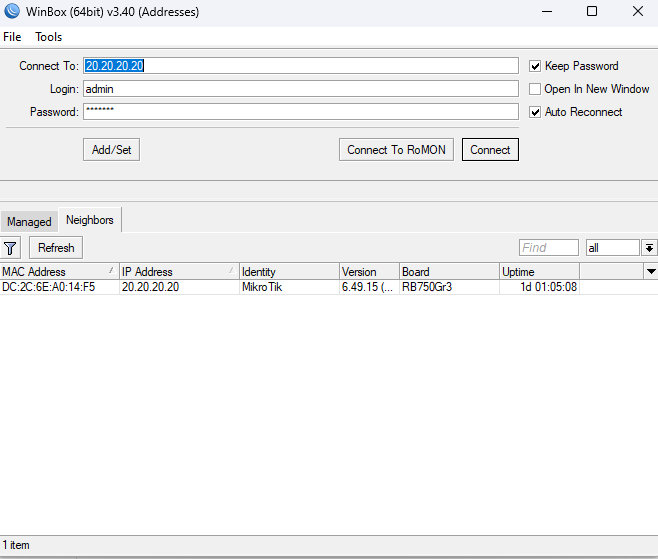
- Open Winbox or use SSH to access your MikroTik device.
- Enter the SNMP menu:
/snmp
- Check the current SNMP status:
/snmp print
You should see:
enabled: no - Enable SNMP:
/snmp set enabled=yes
- Verify SNMP is enabled:
/snmp print
Configuring SNMP Communities
Community strings work like passwords for SNMP access. Avoid using default names like “public” or “private.” Set a unique string:
- View current community settings:
/snmp community print
- Change the default community:
/snmp community set [find name="public"] name=secureCommunity read-access=yes write-access=no
- Limit access to your monitoring server (for example, IP 192.168.1.10):
/snmp community set [find name="secureCommunity"] addresses=192.168.1.10/32
Setting Contact and Location Information
Set the administrator contact and device location for easier identification:
/snmp set contact="admin@example.com"
/snmp set location="Data Center 1"
Enabling SNMP Traps
SNMP traps send alerts to your monitoring system when events occur.
- Set the trap target IP (e.g., monitoring server at 192.168.1.10):
/snmp set trap-target=192.168.1.10
- Set the trap community:
/snmp set trap-community=secureCommunity
- Choose the trap version (e.g., version 2):
/snmp set trap-version=2
4. Advanced SNMP Configuration Techniques
Securing SNMP with Version 3
SNMP v3 offers user authentication and encryption. Follow these steps to set it up:
- Ensure SNMP is enabled:
/snmp set enabled=yes
- Create an SNMP v3 user:
/snmp user add name=snmpUser group=read auth-protocol=sha1 auth-password=StrongAuthPass priv-protocol=aes priv-password=StrongPrivPass
Replace
snmpUser,StrongAuthPass, andStrongPrivPasswith your chosen values. - Create an SNMP group with read access:
/snmp group add name=read security=private read-access=yes
- Optionally, update contact and location:
/snmp set contact="snmpadmin@example.com" location="Branch Office"
Configuring SNMP Write Access
SNMP write access allows changes to device settings using SNMP commands. Use this feature with caution.
To enable write access on a community:
/snmp community set [find name="secureCommunity"] write-access=yes
Use write access only in trusted environments.
Integration with Monitoring Tools
Many monitoring tools support SNMP. Here are examples for popular options:
Zabbix Integration
- Add your MikroTik device to Zabbix.
- Set SNMP version to 2c and use the community string
secureCommunity. - Configure the host with the correct IP address.
- Zabbix will poll the device and display graphs of CPU usage, traffic, and more.
The Dude Integration
- Add your MikroTik device using The Dude client.
- Enter the SNMP community string and device IP.
- The Dude displays maps, device status, and performance graphs.
LibreNMS Integration
- Add your device to LibreNMS.
- Set SNMP version and community string as configured.
- LibreNMS auto-discovers device information and creates long-term graphs.
5. Testing and Troubleshooting SNMP on MikroTik
Using SNMP Tools
Use snmpwalk to check the SNMP configuration. For SNMP v2c, run:
snmpwalk -v2c -c secureCommunity 192.168.1.1
Replace 192.168.1.1 with your device IP.
For SNMP v3, run:
snmpwalk -v3 -u snmpUser -l authPriv -a SHA -A StrongAuthPass -x AES -X StrongPrivPass 192.168.1.1
Checking Firewall Rules
SNMP uses UDP port 161. Add a firewall rule to allow SNMP traffic:
/ip firewall filter add chain=input protocol=udp port=161 action=accept comment="Allow SNMP"
Verifying SNMP Status
Confirm the SNMP settings by running:
/snmp print
Ensure that SNMP is enabled and your settings are correct.
Reviewing SNMP Logs
Check the logs for SNMP-related messages:
/log print where message~"snmp"
Look for any errors or timeout messages to adjust your configuration.
6. Best Practices for Enterprise SNMP Deployments
Use Non-Default Community Strings
Change default strings like “public” and “private” to unique values:
/snmp community set [find name="public"] name=secureCommunity
Employ SNMP v3 for Sensitive Environments
SNMP v3 adds authentication and encryption. Use it when handling sensitive data.
Restrict SNMP Access by IP
Limit SNMP access to trusted IP addresses:
/snmp community set [find name="secureCommunity"] addresses=192.168.1.10/32
Optimize Polling Intervals
Use polling intervals between 30 seconds and 1 minute. This balance keeps data current without overloading the network.
Maintain Updated MIB Files
Download the latest MikroTik MIB file from the official website. Keep a copy in a central repository.
Use SNMP Traps for Proactive Alerts
Configure traps to notify you when devices report critical events:
/snmp set trap-target=192.168.1.10
/snmp set trap-community=secureCommunity
/snmp set trap-version=2
Monitor CPU Load and Traffic
Check that polling does not overload devices. Use tools like snmpwalk to measure performance.
Document Your SNMP Setup
Record all SNMP settings, community strings, SNMP v3 user details, and firewall rules. Documentation helps with future troubleshooting.
7. Conclusion and Additional Resources
This article explained SNMP configuration on MikroTik devices. You learned how to enable SNMP, set secure community strings, configure SNMP v3, and integrate SNMP with monitoring tools like Zabbix, The Dude, and LibreNMS.
Recap of Key Steps:
- Enable SNMP using
/snmp set enabled=yes. - Set unique community strings and limit access by IP.
- Configure contact and location settings for device identification.
- Set up SNMP traps to send alerts to your monitoring server.
- Configure SNMP v3 with authentication and encryption for added security.
- Test the configuration using
snmpwalkand verify logs. - Follow best practices to keep your network secure and efficient.
Final Recommendations: Use SNMP to monitor your network devices in real time. Adjust settings as your network grows. Integrate SNMP data with your preferred monitoring tool. Stay up to date with the latest MIB files and document your configuration changes.
Additional Resources:
Use this guide as a reference when you update your devices or add new ones. Regular testing and documentation will help you maintain a stable network monitoring system.
Deploy SNMP on your MikroTik devices today. Check your firewall rules, update your community strings, and secure your SNMP configuration using SNMP v3. These clear steps and real examples should help you build a monitoring system that meets your network needs.


